How to Register Client Check-Ins and Check-Outs
Step 1: Checking In a Client
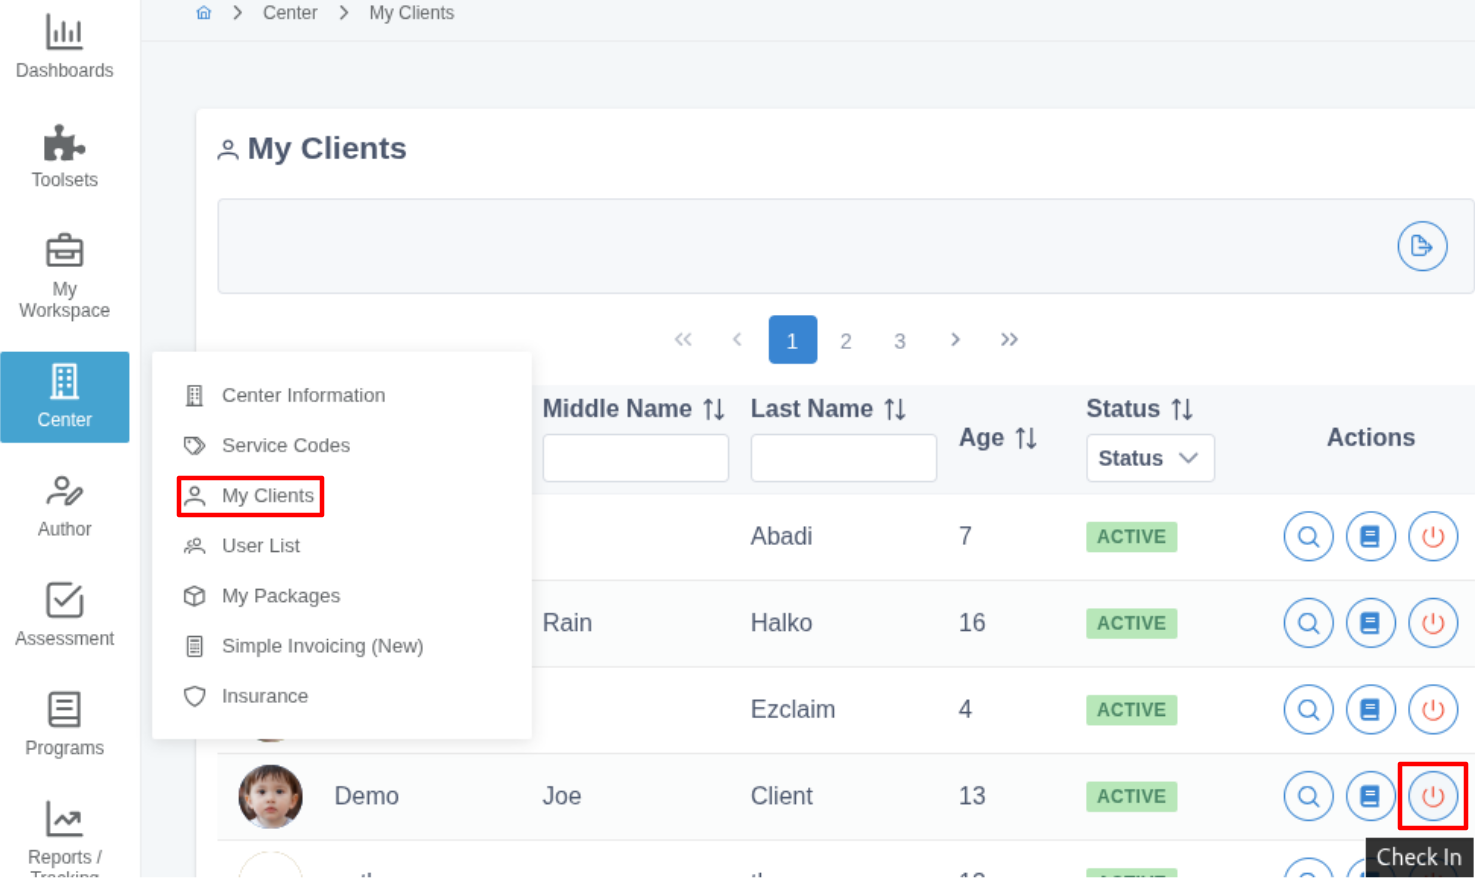
To log a client's arrival, go to the Center → My Clients screen and locate the corresponding client profile.
In the actions column, click the
Check-In button
.
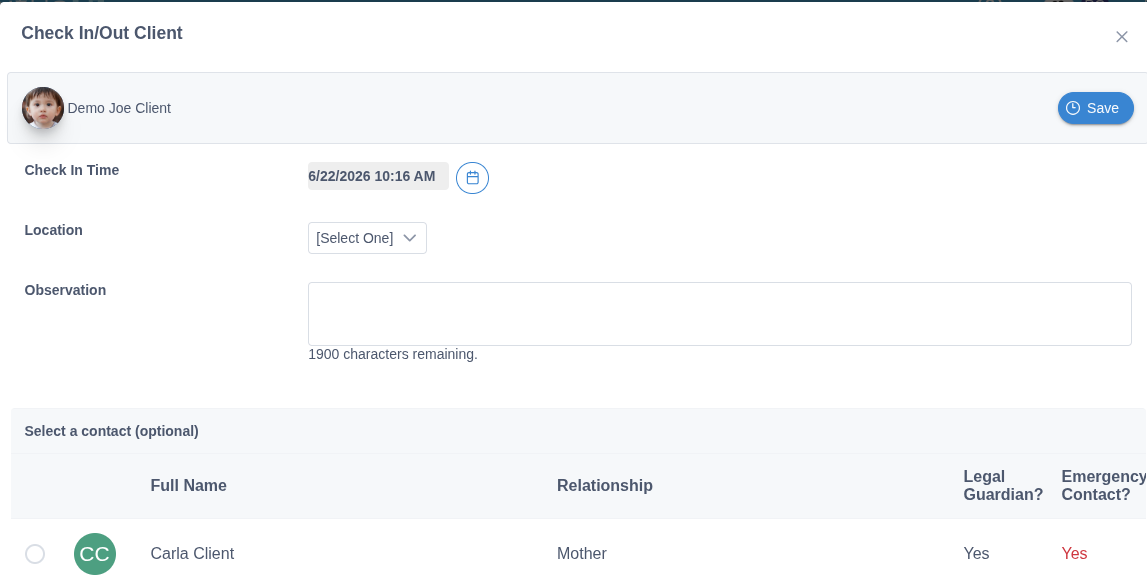
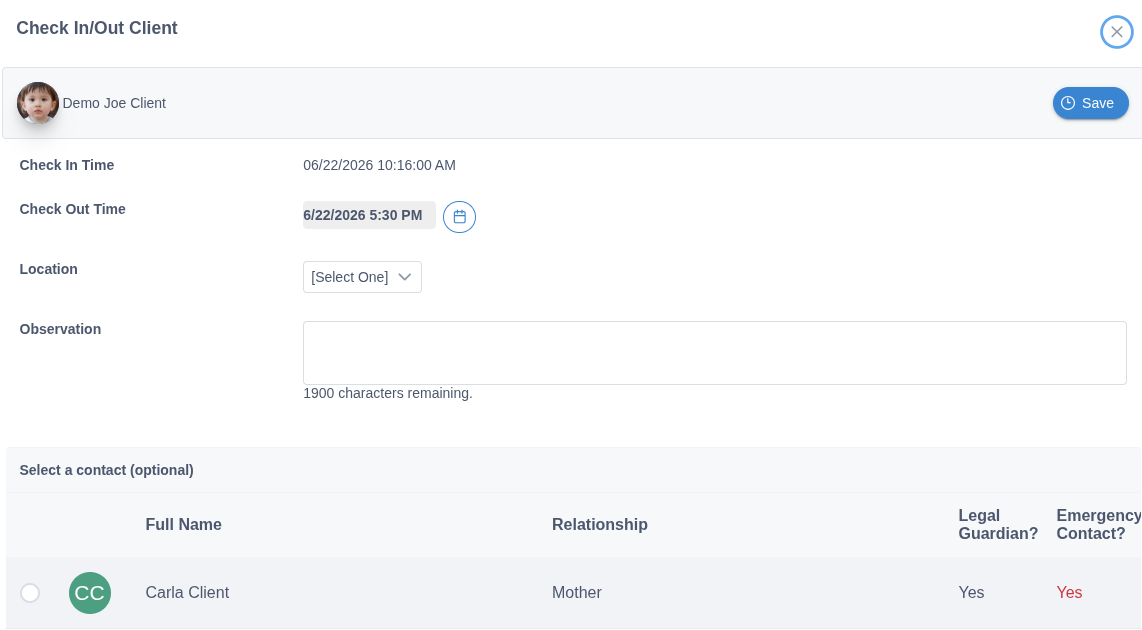
This button will open the check-in screen, where you can specify the location, select companions from the contact list, and add any necessary notes.
Step 2: Checking Out a Client
When the client leaves, return to Center → My Clients . You will notice that the status icon has changed color, indicating that the client is currently checked in.
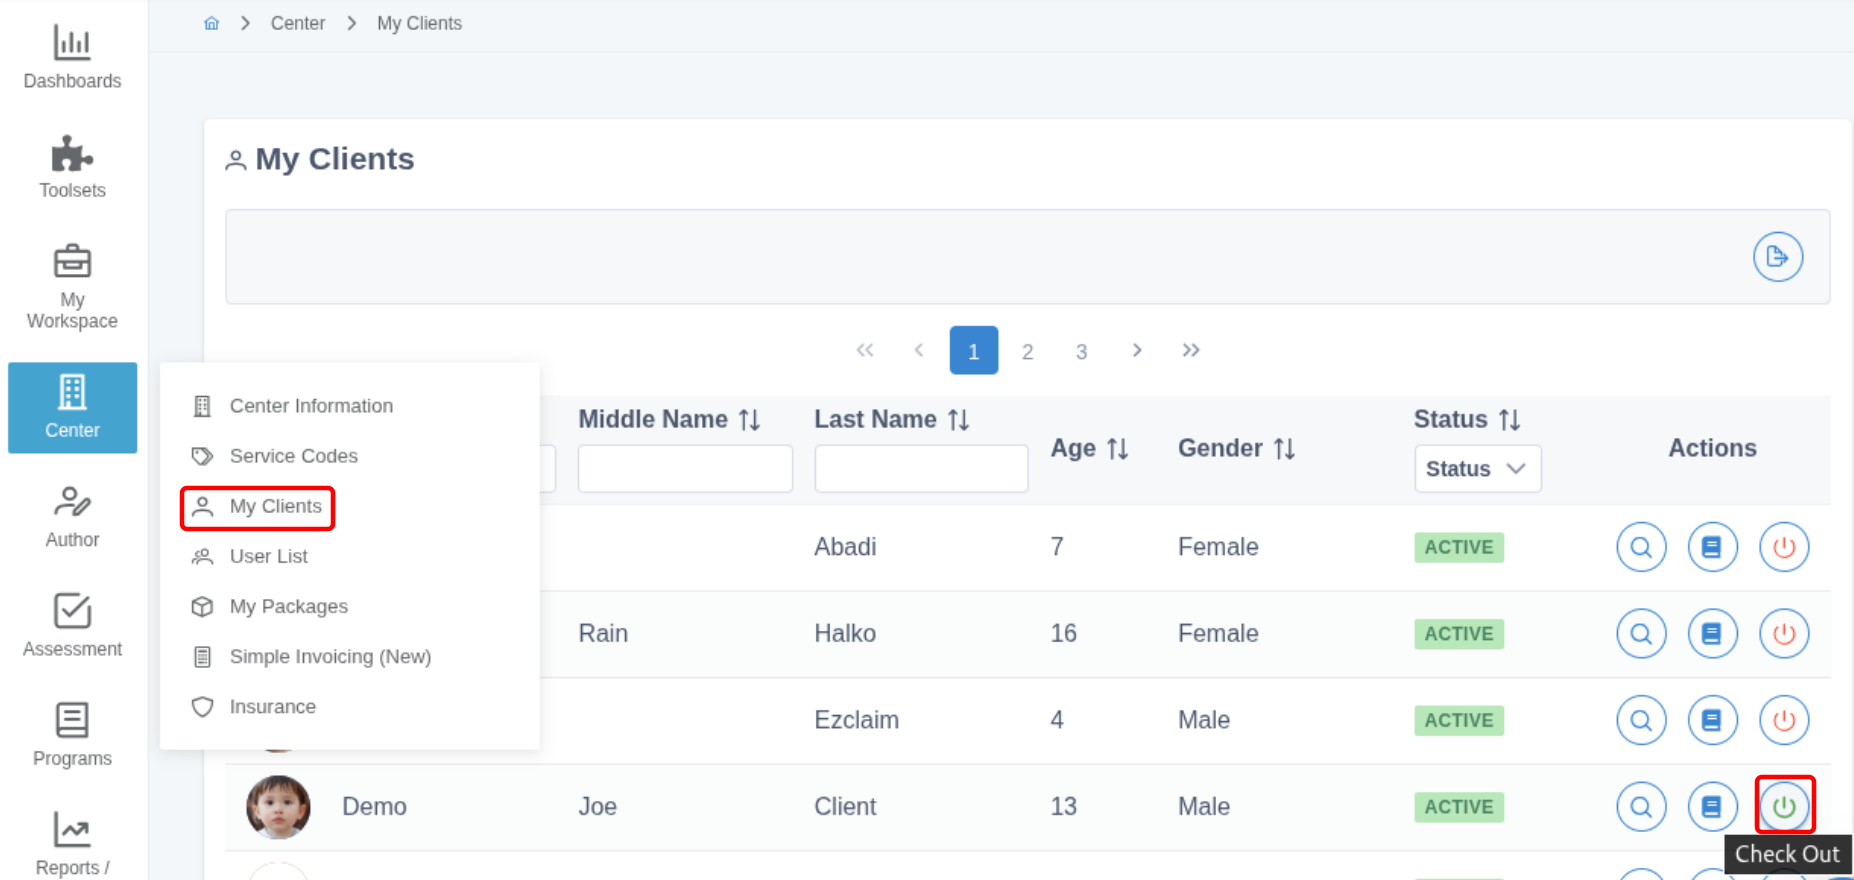
Click this button to open the check-out form, where you can complete the departure details and save the entry.
Step 3: Viewing Client Check-In and Check-Out Logs
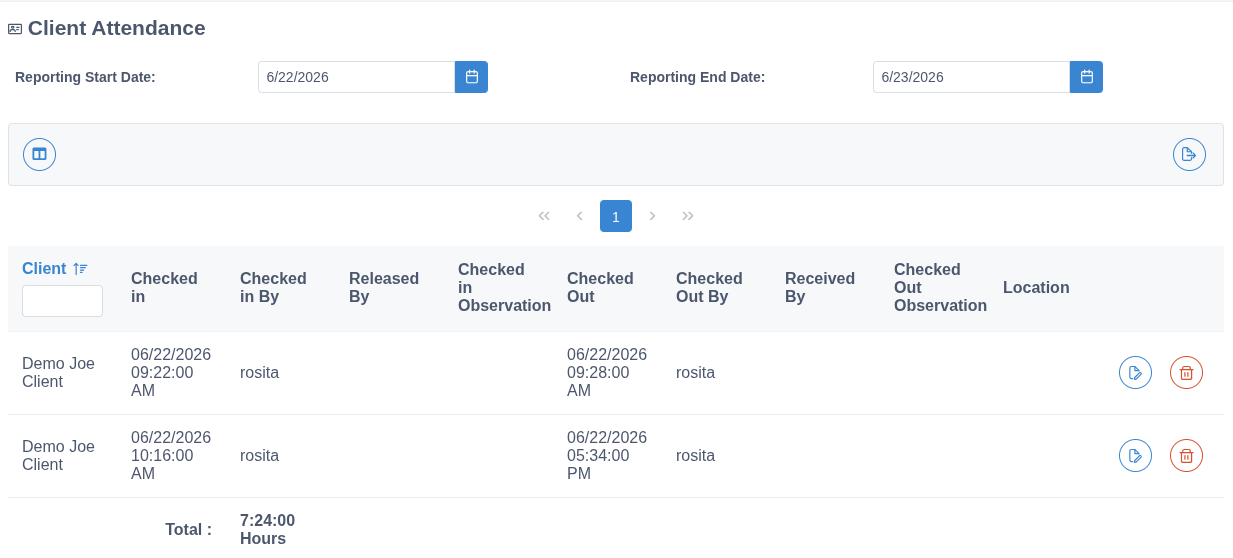
If you want to review the attendance history, go to the Reports / Tracking menu and select the Client Attendance option.
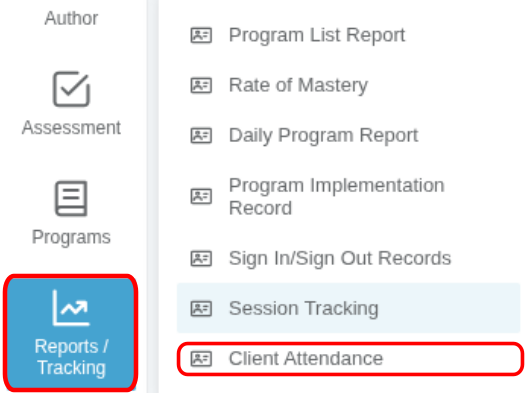
This section provides a centralized view of all historical data and a detailed breakdown of your clients' check-in activity.