The purpose of this guide is to help you get started with your account. We will cover the following key areas:
- Setting up users – Creating user profiles and assigning them to each other
- Security – Implementing security measures to protect your data
- Creating/Removing users – Adding or removing user access as needed
- Assigning users – Defining roles and responsibilities for each user
- Assigning clients – Linking clients to specific users or groups
- Updating center information – Managing and updating your center’s details
- Billing – Navigating billing processes and payments
- Support Center – Accessing assistance and support resources
Important Account and Compliance Information
Privacy and Compliance
It’s essential to understand that your account is HIPAA and FERPA compliant, adhering to strict regulations for the management of personal health information (PHI). These guidelines apply to all account holders to ensure that your data remains secure. Your user experience and our communication with you are aligned with these regulations.
Account Owners are responsible for maintaining data accuracy and user access at all times. Communication with account owners is handled through strict identity management protocols to ensure secure interactions.
Communication Guidelines and Identity Management
Our support team is dedicated to providing you with consistent guidance and assistance while safeguarding your privacy. When you or your team reach out for support, we must verify the identity of the person and their connection to your account. This verification happens automatically when support requests are submitted using the integrated support ticketing system within UnitusTI (please refer to the related section below for details on submitting support requests).
Account Owners should always use the email address linked to the account during registration to confirm their identity. Failing to do so may result in delays, as additional measures may be required. If ownership changes, please inform us immediately so that we can perform necessary operational updates to our records. Delays can be avoided by following the guidelines outlined in the related section below.
Setting Up Your Account
The first step in setting up your account is logging in with the configuration login provided in your account release email. Once logged in, you can begin creating user logins for your team, setting up client profiles, and assigning users to clients to enable collaboration.
1. Sign into UnitusTI
We recommend using Google Chrome or Safari as your browser when accessing UnitusTI. While other browsers may work, we cannot guarantee full functionality. For the best experience, ensure that your browser and operating system are up to date.
Your initial login credentials are for a Configuration User , a system-generated account profile that grants access to your account for the first time. From here, you can create personalized logins for yourself and other team members as needed.
2. Configuration User and Account Owner Role
- The Configuration User account comes with the Account_Owner security role enabled. This role is essential and cannot be manually assigned to other users.
- If you decide to replace the Configuration User with a personalized login for yourself, notify our Support Team so they can reassign the Account_Owner role to your new profile.
Important: Your user profile should always be linked to the email address associated with your subscription plan. If you update the email in your user profile, ensure that the same update is made in your billing profile to avoid delays or missed communications. Contact our support team if you need assistance locating your billing portal link.
3. Keeping or Replacing the Configuration Profile
- You can choose to retain the Configuration User profile (it will already be associated with your owner email) or create a personalized login with a username of your choice.
- If you opt to create a personalized login and delete the Configuration User profile, ensure that you have successfully logged into the new profile before removing the Configuration User account.
Tip: Retaining the Configuration User as a backup account can be helpful during the early stages of setting up your account.
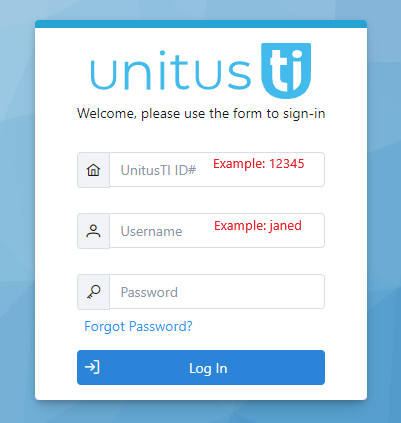
For troubleshooting or more info, see this help article .
Logging In: Go here to choose your region or choose below:
Fill in the designated fields (see screenshot above) with your login information, then click “Log In”. (For new account owners, your configuration login has been provided in the account release email.)
Your configuration account has been enabled with the highest security level: Administrator . Refer to the Security Roles Table as you create other user accounts to ensure that you assign roles with appropriate permissions. Be sure to assign this role to yourself if you create a new user login to ensure you are able to access all areas of UnitusTI.
2. Create User Accounts
Video ( click here or go to the “?” icon at the top of your UnitusTI screen to see a list of related videos for the page you are on).
For privacy, you are in control of providing and managing your user’s access. Administrative users are tasked with creating and managing all user accounts, including choosing their security permissions and assigning them to the clients that they should be working with. Our team is not able to do this for you for privacy compliance, but we will always be there to help with questions and guidance.
If this is a new account, you are likely logged into it using the configuration login you were provided with upon your account release. You may continue to use the configuration login as your own account or create a personalized user account for yourself with a username of your choosing. To do this, or to create logins for other users in your account (e.g. staff members or parents/caregivers), please follow the instructions below.
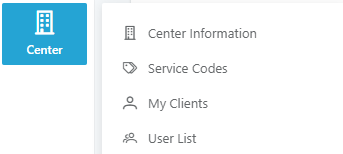
-
Select Center from the
main menu (found
on the left-hand side of the screen or
from the
ham
burger menu
if your screen is not at maximum)
- Select User List
-
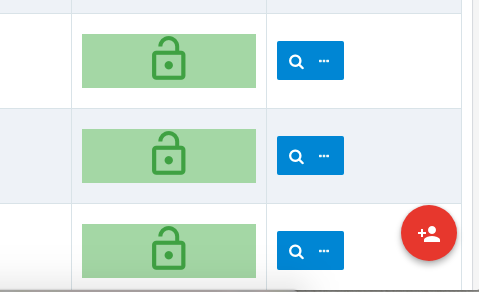
Click the red circle in the bottom right corner of the screen to create a new account
-
Input your information (* indicates a required field) and choose the Role Assignment that is appropriate
(cli
ck here for a full list of roles and permissions)
.
Be sure to enter a valid email address in the email field. This will allow you to recover your password in the event that you forget your password or become locked out of your account
; the system will email you a reset password email to this email address.
- Select Store Account Data
- Done!
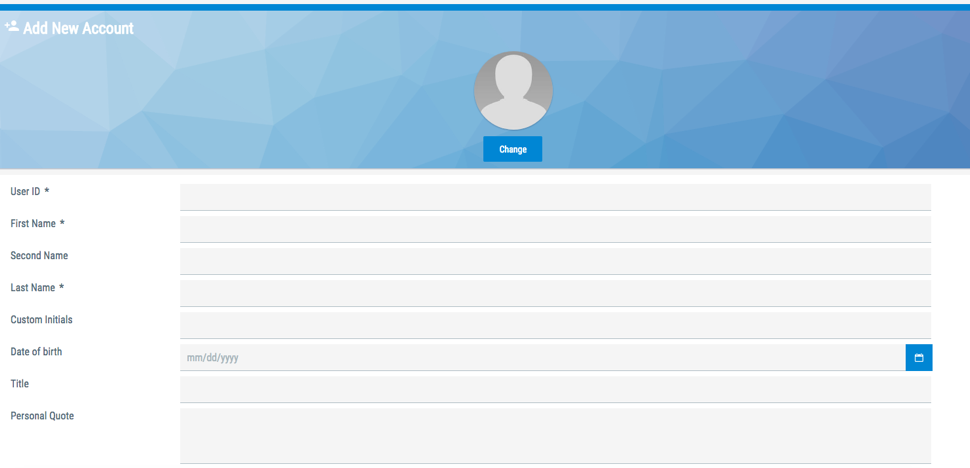
Repeat this process to grant access to other team members (each team member should have a unique login) and provide them with their login information, which will not be emailed to them automatically.
Tips for creating user accounts:
- User IDs (Usernames) cannot be changed or edited after saving the first time
- If you receive an error message indicating that a username/User ID is already in use, this may be because usernames are stored in a global repository, not necessarily because you have assigned that user ID in your account.
- Be sure to keep user email addresses correct and current. While email addresses are never used to log in, the system will automatically use it to send reset password emails when a user has used the Forgot Password feature.
- Users are not emailed their account login credentials. Once you are ready to share that information with them, please do so securely and provide the following details:
- URL to log in
- UnitusTI ID number (this is the 5 digit account number for your account, which is used by all users at login)
- Username (User ID) - this is the user ID you created in their user profile
- Password (you may give them the password you created or simply have them use the Forgot Password option on the login screen to create a new password immediately)
Note: When creating a password, it should be at least six characters and include at least one uppercase letter, lowercase letter, number and special character (e.g. # ! *, etc.). Users will be prompted to change their password every six months as part of required privacy compliance guidelines.
Mundo Pato Inc. staff do not have administrative access to your account, so it is important that you maintain best practices to keep your account password secure. Here are some tips for optimal password protection:
- Never share your password with Mundo Pato employees (such as our Support team, etc.). They will never ask you for this information and it is not necessary for us to be able to assist you
- Never write passwords down
- Never send a password through email
- Never include a password in a non-encrypted stored document
- Never tell anyone your password
- Never reveal your password over the telephone
- Never hint at the format of your password
- Never reveal or hint at your password on a form on the internet
- Never use the "Remember Password" feature of your internet browser or other program
- Never use your corporate or network password on an account over the internet which does not have a secure login where the web browser address starts with https:// rather than http://
- Report any suspicion of your password being broken to your administrator
- If anyone asks for your password, refer them to your administrator
- Don't use common acronyms as part of your password
- Don't use common words or reverse spelling of words in part of your password
- Don't use names of people or places as part of your password
- Don't use part of your login name in your password
- Don't use parts of numbers easily remembered such as phone numbers, social security numbers, or street addresses
- Be careful about letting someone see you type your password
- Use symbols, letters and numbers to compose your password
- It is good practice to change your password regularly. UnitusTI will prompt users to do this every 6 months as a required part of privacy compliance.
Removing User Accounts
To remove an account, please follow the instructions below.
Note that removing a user account is a permanent step. User activity with a client is recorded on the client’s record, so removing a user will not erase that; it will simply remove the user’s access and any information in their user profile (e.g. address, user documents, etc.). It is not possible to restore a removed user, so in the case that you need to provide access to the user again, simply create a new user account for them.
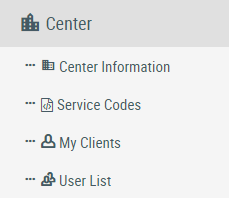
1. Select Center from the column of options on the left-hand side of the screen
2. Select User List
3. Click the arrow to the left of the See Details button, under the Actions column, of the account you would like to remove
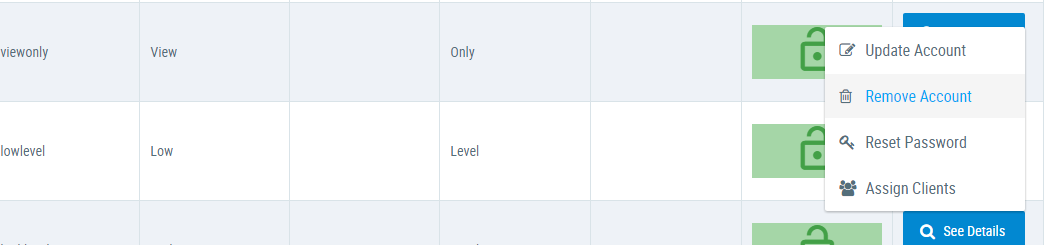
4. Choose the appropriate option and follow the instructions on the screen.
5. Done!
3. Create Clients
(e.g. students or others receiving your services):
Tip: Select the “?” icon at the top of your UnitusTI screen to see a list of suggested help articles and videos related to the page you are on.
We have provided one free test client: Training Pato

*Note: Once you have created an Administrator account, assign Training Pato to that account in order to have access to this test client. See instructions below.
Once you are ready to start adding clients, please follow these steps-
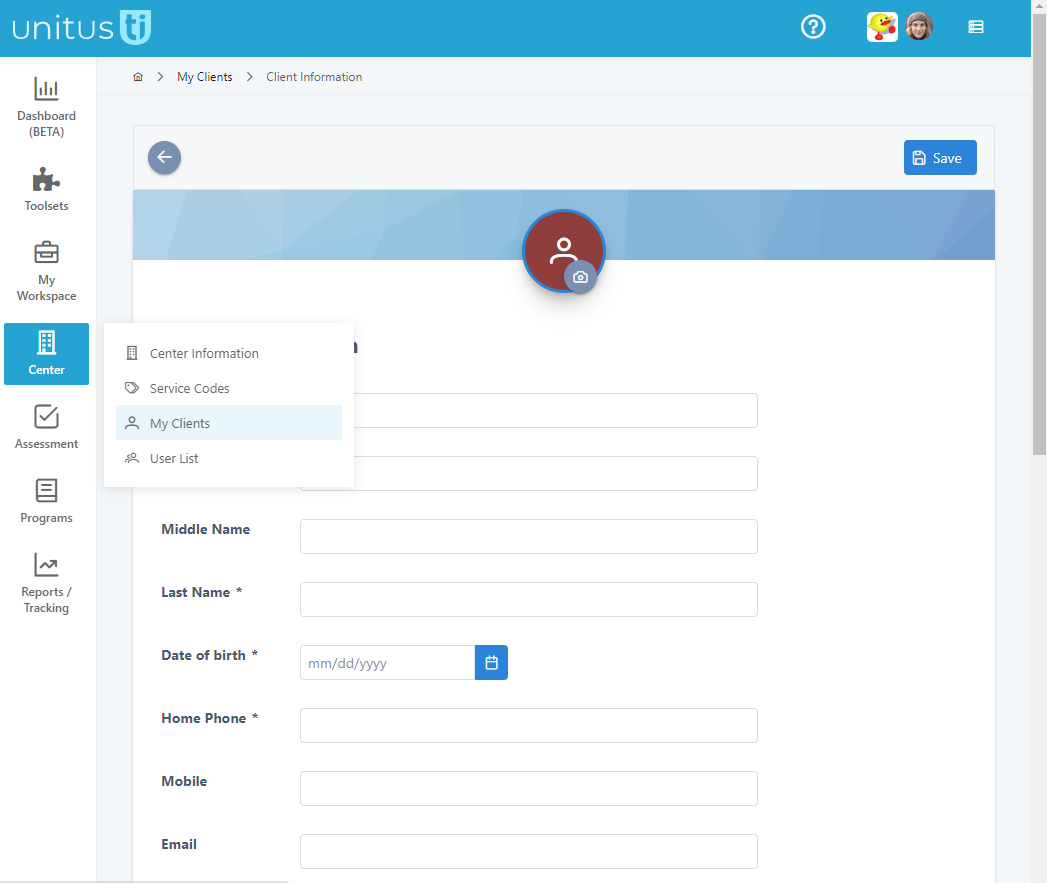
1. Select Center from the main menu
2. Select My Clients
3. Select the red circle icon in the bottom right corner of the screen
4. On the Client Information page, fill out all the desired information
5. Select “Save” and you will be prompted to assign the client to yourself
(if you skip this step, you will not see the new client in your My Clients list, though you can always assign them to yourself at any time from the user list)
6. Once saved, scroll to the bottom of the screen and click “Team Members” – select “Add Team Members” to add other appropriate users to this client so that they can also view them in My Clients and work with them in UnitusTI
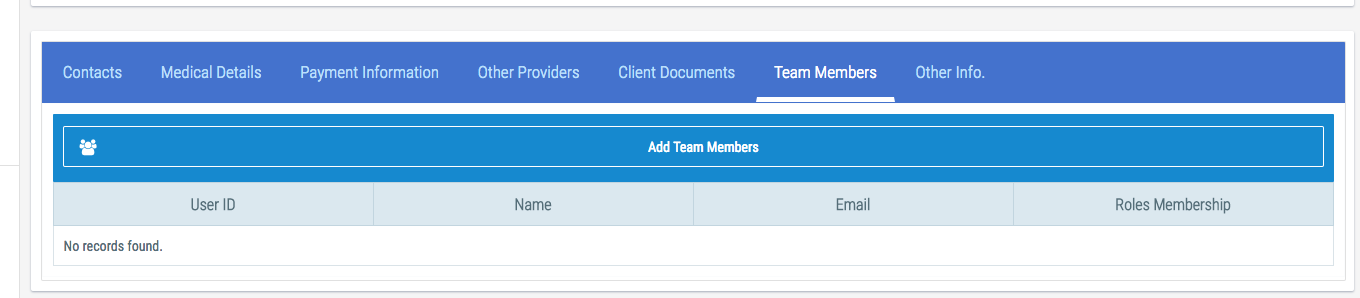
7. Select the checkbox next to your name to assign yourself to the client. Repeat for any other users who should have access to the client’s information and programs.
(Tip: if you miss this step or wish to perform it later, you may assign clients to users from the User List page or the user’s profile. Note that users cannot access the client until they are assigned to them.)
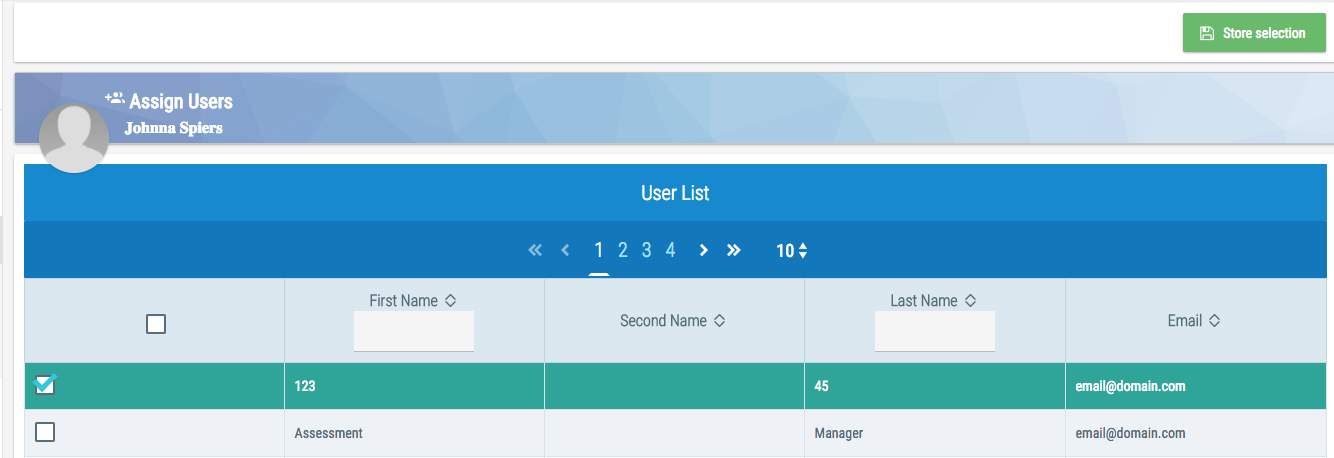
8. Click “Store Selection”, then click “Save” in the client’s profile page.
4. Assign Clients to Users
Tip: Select the “?” icon at the top of your screen to see a list of videos related to the page you are on
As you create new user accounts for your staff, you will want to be sure to assign relevant clients to those users. If you do not assign your clients to a User, they will not be able to “see” the client’s in the client list, this is a critical step. To assign clients please follow the instructions below.
- Select Center from the main menu on the left side of the screen
- Select User List
- Find the User who you would like to assign the client to
-
Click the arrow in the Actions column on the left for that user
- Choose Assign Clients
-
Find and check the box to the left of the client’s name whom you would like to assign to that User
- Select “Store selection” button in the top right corner of the screen
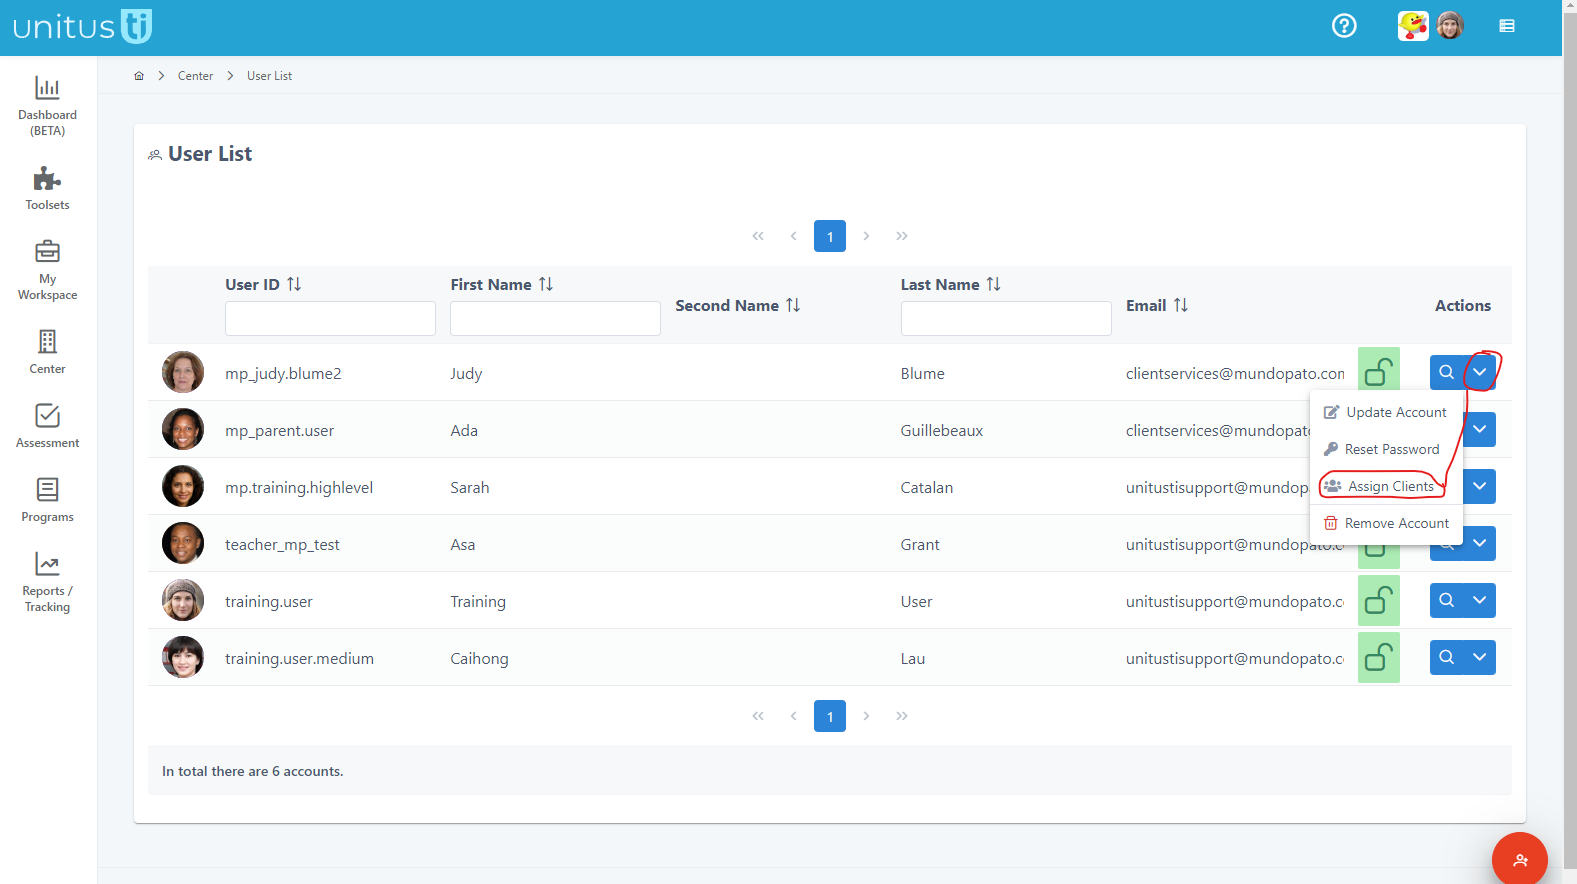
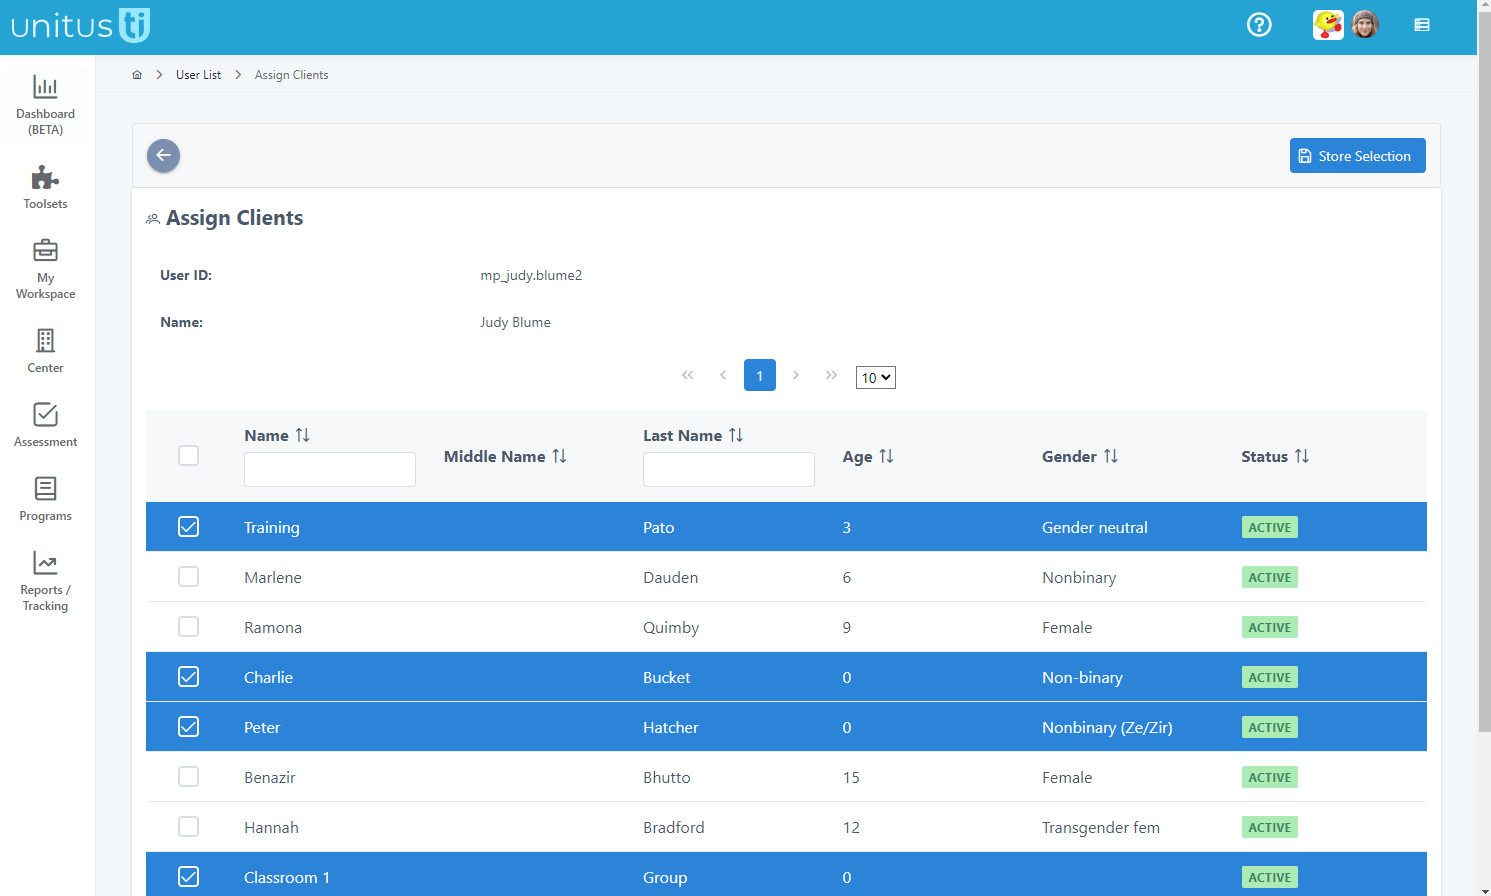
All done! The User you have chosen to assign that client to, will now be able to view the client in their own My Clients list and run the activities (e.g. programs, assessments, virtual materials, etc.) that have been assigned to the client. (Note that access to these areas also depends on the security role assigned to the user.)
*Note: Even if you are the one creating the clients - you will still need to assign them to yourself. Client information is not visible until assigned to a user as a security measure.
5. Review/Update Center Information
The Center Information area of UnitusTI is where you manage your organization details, such as your address, company name, time zone, etc. (Time zone setting will affect all the time stamped information recorded by all users, such as session data.) New account-wide settings may become available over time in the Account Setup tab of this area, as well.
To add or update your organization information, please follow these steps:
- Select Center from the menu options on the left side of the UnitusTI screen
- Select Center Information
- Click on the fields to update with desired information (you may also add your own logo here)
- Select Update Data
- Done!
Other settings available here include the following tabs:
- Center Documents - upload and share documents with all your users in this document storage area. Use this area for any document that may be seen by all users in your account, such as your practice guidelines, general help document or other document that does not contain private information. This area is not recommended for storing sensitive documents; you may use the document storage areas found in user and client profiles, or in My Documents, for private information.
- Employee Status - create labels that you can apply in user profiles, such as Part Time, Full Time, or Parent. Employee Status labels are created and managed in the Employee Status tab in Center Information and applied to users and clients in their respective profiles. Do not use sensitive information in your labels, as this area is accessible to most user security roles.
- Zones - create custom labels for users and clients who should be grouped together in “Zones” (e.g. schools within a school district or centers you own in different geographical locations). Applying a “Zone” label to a user or a client will restrict them from being assigned to anyone who does not have the same label. Zone labels are created and managed in the Zones tab in Center Information and applied to users and clients in their respective profiles. Do not use sensitive information in your labels, as this area is accessible to most user security roles.
- Account Setup - this area allows you to add a Zoom account API (to allow you to add Zoom meeting links in your calendar events), create Session Note templates (pick the fields that should always be visible and/or required in session notes), and toggle on the ability to reject or accept session notes with the Session Notes Audit Mode Toggling this on will display “Accept and Reject options in the Session Notes and will be visible to users to whom you’ve assigned the Auditor or Reviewer1 security roles. New settings may be added to this area periodically.
Getting Help:
Support
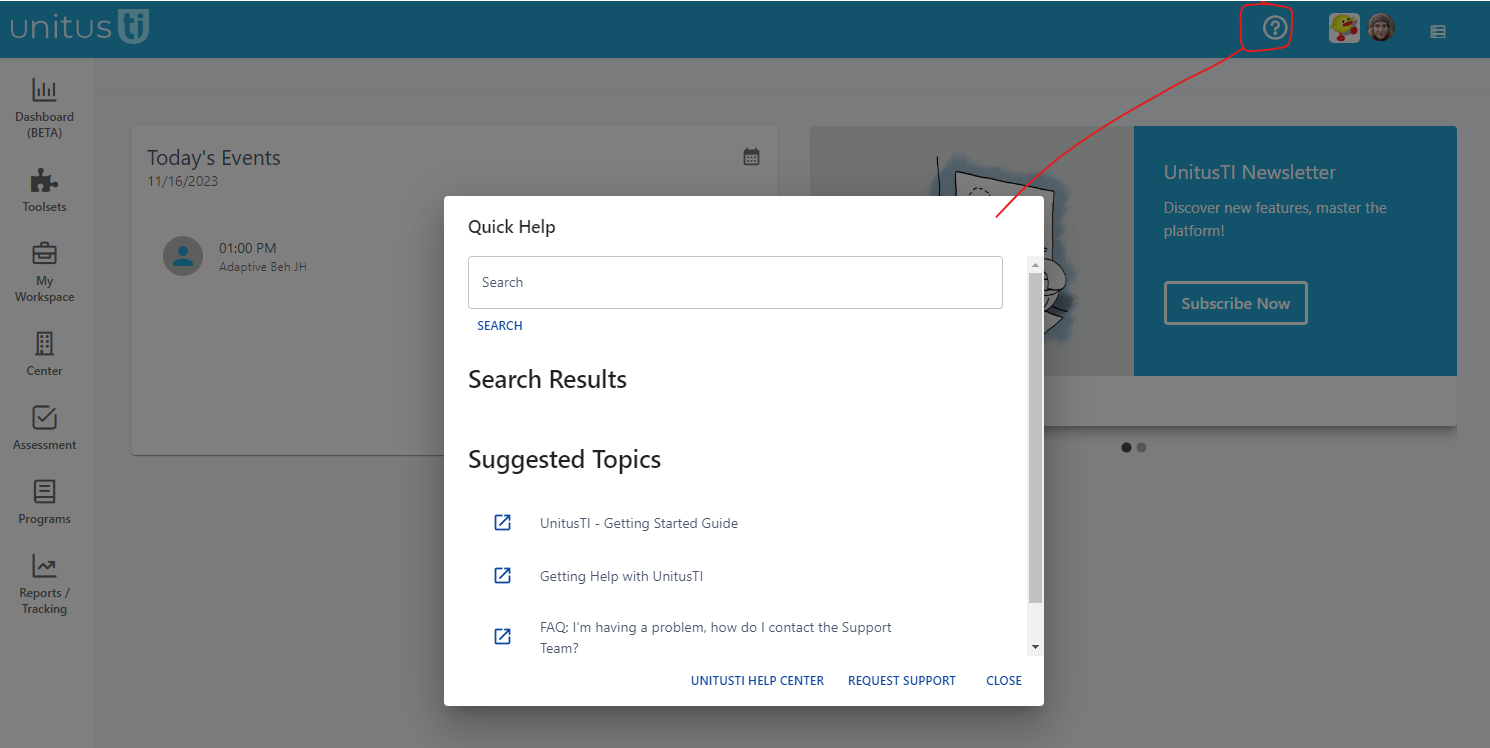
For any questions that arise regarding the use of UnitusTI, please contact our support team by doing the following:
- Click on the question mark icon on the top right-hand corner of your UnitusTI screen (see screenshot above)
- Select Request Support
- Fill in the required fields in the support ticket window (for fastest results to your questions, use as much detail as possible!)
- Take a moment to ensure that your email address is valid – this will allow us to contact you with an answer to your questions or request follow-up information from you in an efficient manner. (A ticket that hasn’t been responded to within 24 business hours may mean the email address had a typo.)
- Click Send
Using this support ticket feature while logged into the account also ensures that proper identity management is maintained. After you receive the confirmation email, you may reply with any screenshots you wish to share.
More help is available from the dedicated support website, here. Note: Please encourage your staff to bookmark the UnitusTI Help Center website. This area is ideal for viewing tutorial videos, reading help articles and catching up on system update details, or simply for sending a support ticket if they are unable to login.
Billing Information
For any billing questions, please contact Accounting at admin@mundopato.com .