What is Custom HTML in Assessments ?
I have developers in my team! Can I write my own HTML code?
I don’t have developers in my team. How Can I produce HTML for my assessments?
Example 1: Single video from Youtube
Step 1: Copy the Youtube embed URL
Step 2: Open the HTML Generator
Step 5: Paste the code in the assessment
Step 6: Preview your assessment!
Example 2: Single video from Media Library
Step 2: Open the HTML Generator
Step 5: Paste the code into your Assessment’s Question
Step 6: Preview your assessment
Example 3: Multiple videos and interactive answers
Step 1: Open the HTML Generator
Step 4: Paste the code into your Assessment’s Question
Step 5: Decide if you want to hide or show the question and answer areas
Step 6: Match the assessment answers to the HTML answers
Bonus: embedding Flashcards in assessments
Step 1: Select the Pack and the Slide that you want to embed
What is Custom HTML in Assessments ?
When creating questions for your assessments in the Assessment List, you’ll find a new field called Custom Code. This custom code block lets you embed content using HTML and javascript code, allowing you to create formatted text, tables, links, videos, pictures and audio files and all kinds of interactive elements in your assessment questions, far beyond what is available in the Additional Information field.
These are a few examples of custom HTML in assessments:
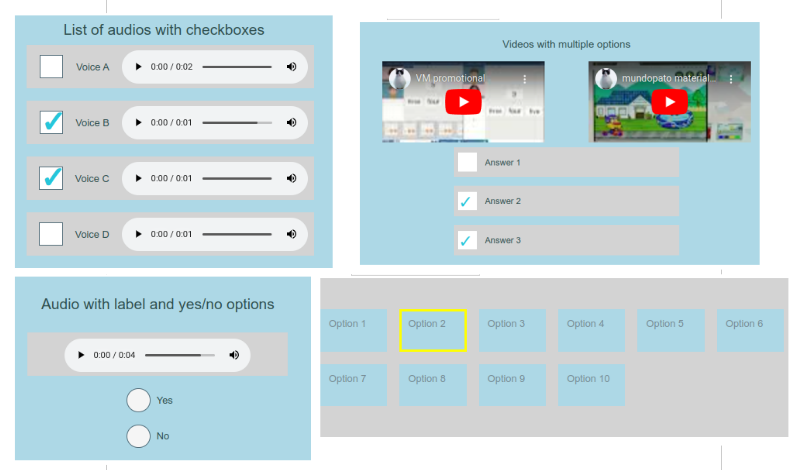
I have developers in my team! Can I write my own HTML code?
Writing custom HTML interactions from scratch is possible, but it demands basic knowledge of Javascript and HTML. If you want to follow this path, please check the instructions for developers in the Mundo Pato developers guide .
I don’t have developers in my team. How Can I produce HTML for my assessments?
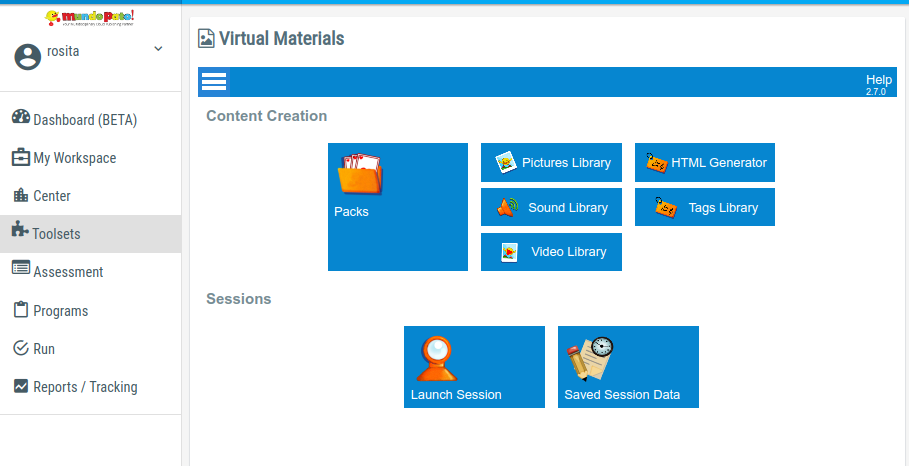
The Virtual Materials Toolset offers a HTML Generator with a set of premade templates that you can use to generate your interactions.
You will find the Virtual Material Toolset under the Toolsets main menu:
Tip: Use the Video Library and Audio Library to upload your media assets and customize your questions!
Example 1: Single video from Youtube
In this example, we are going to embed a video hosted in youtube in an assessment question.
Step 1: Copy the Youtube embed URL
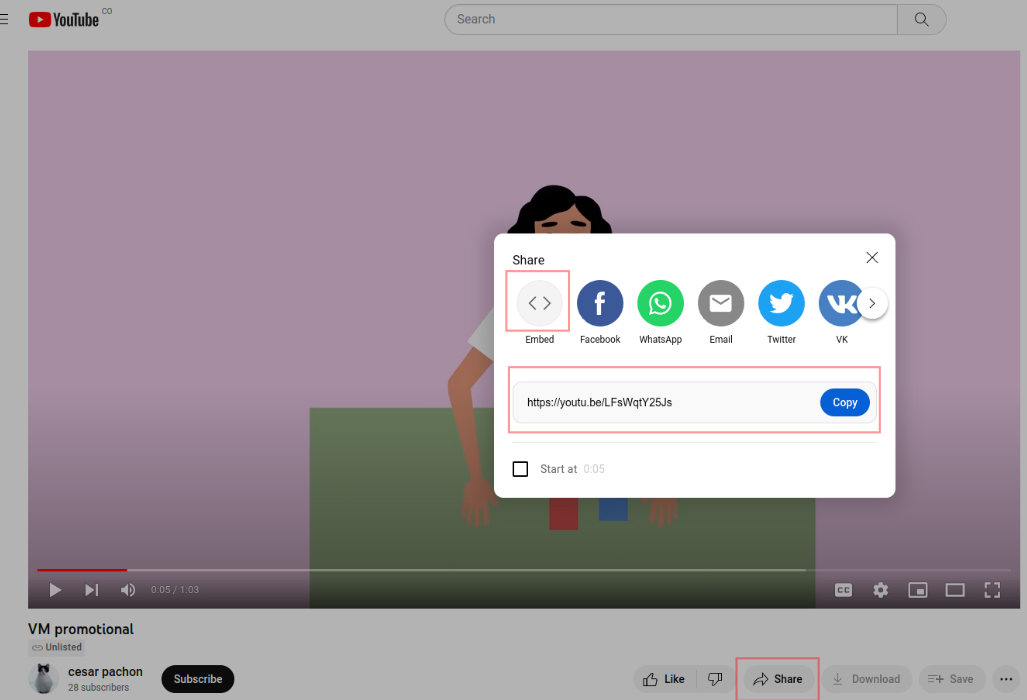
In youtube, click on “share” and then select the “Embed” option. Use the copy button to copy the URL to your clipboard.
Step 2: Open the HTML Generator
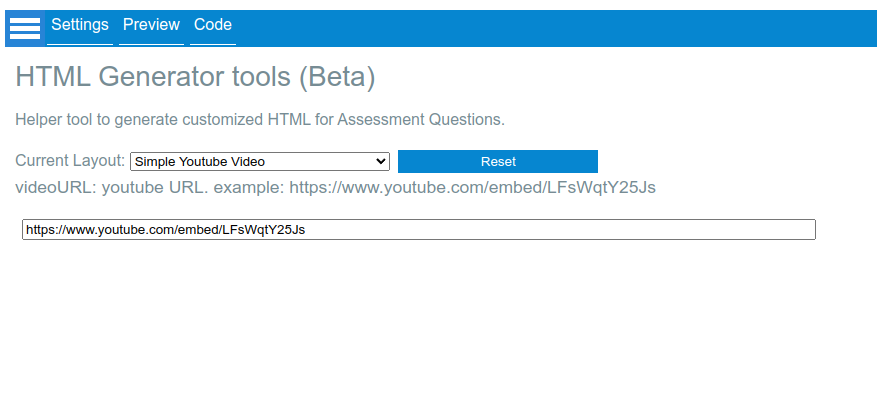
In the home menu of the Virtual Materials Toolset, select “HTML Generator” and then select the “Simple Youtube Video” layout.
Paste the URL that you copied in the step 1.
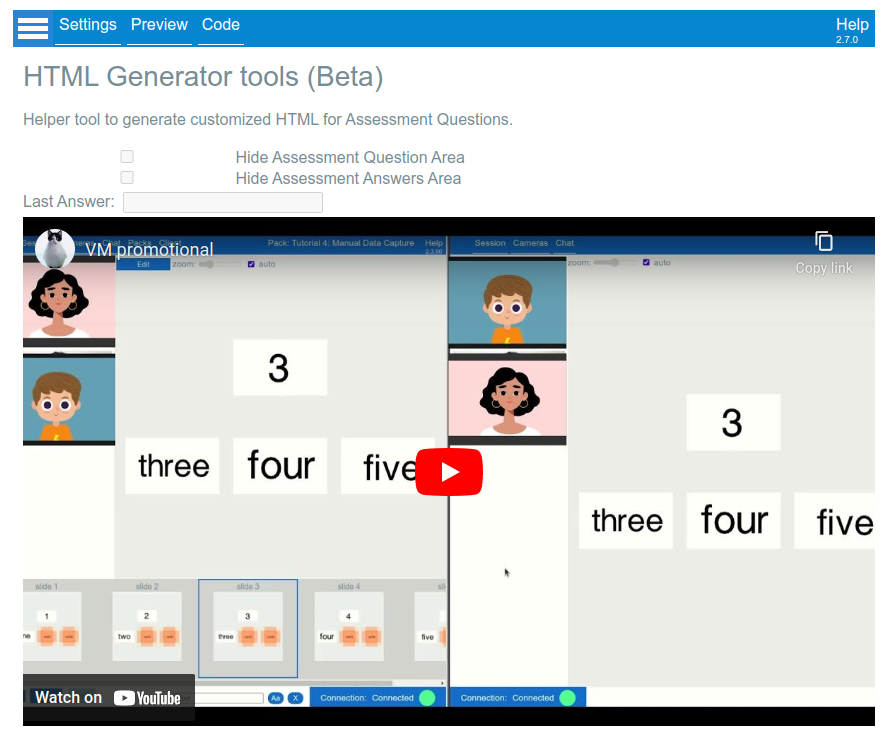
Step 3: Preview
Use the Preview option to visualize how your video will look:
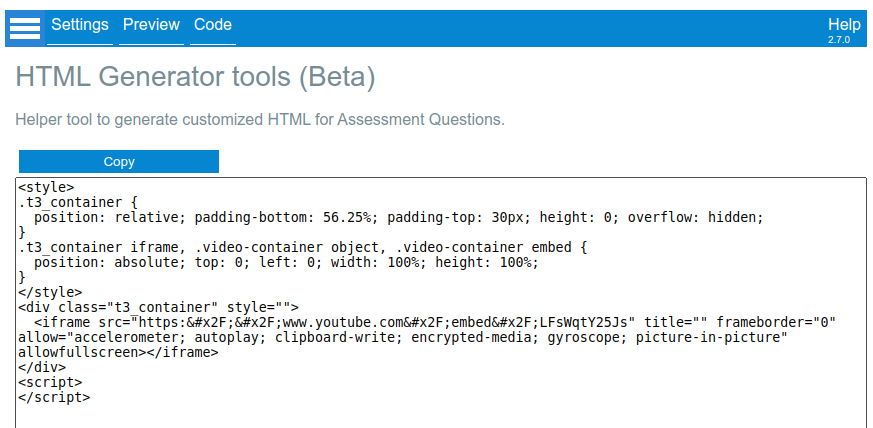
Step 4: Copy the code
Select the option “Code” in the top menu, and use the “Copy” button to copy all the code to your clipboard.
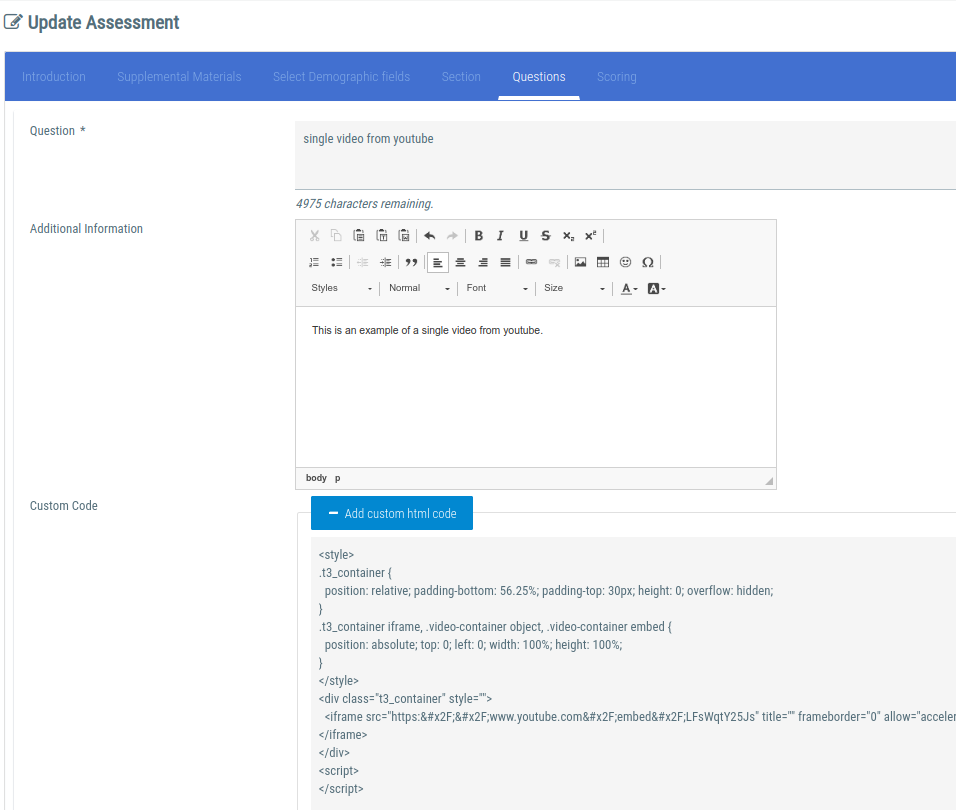
Step 5: Paste the code in the assessment
Create or edit a question in your assessment, and paste the custom code in the “Custom Code” text area (click the “Add Custom Html Code” button to expand it)
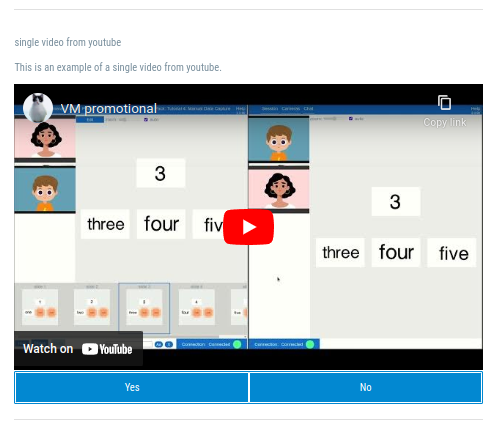
Step 6: Preview your assessment!
This is the final result:
Example 2: Single video from Media Library
In this example, we are going to embed a video stored in the Media Library.
Step 1: Copy the video URL
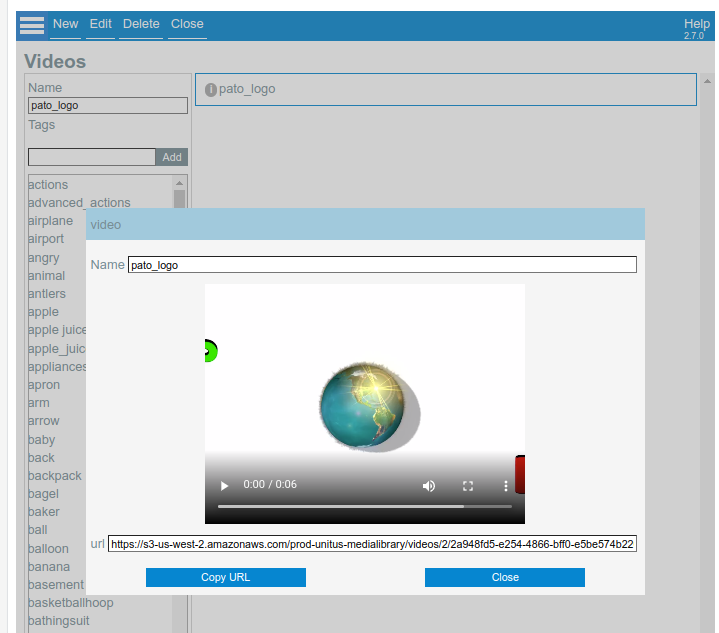
From the home menu of the Virtual Materials Toolset, select “Video Library” and search for a video that you had uploaded previously. Here, we are looking for “pato_logo”.
Click on the “i” icon to preview the video, and click on the “Copy URL” button.
Note : If you don’t have any video for testing at this point, skip this step and use this URL for your test: https://s3-us-west-2.amazonaws.com/prod-unitus-medialibrary/videos/2/2a948fd5-e254-4866-bff0-e5be574b2203.mp4?t=1672690054
Step 2: Open the HTML Generator
Go back to the home screen in the Virtual Materials Toolset, and select the “HTML Generator” button.
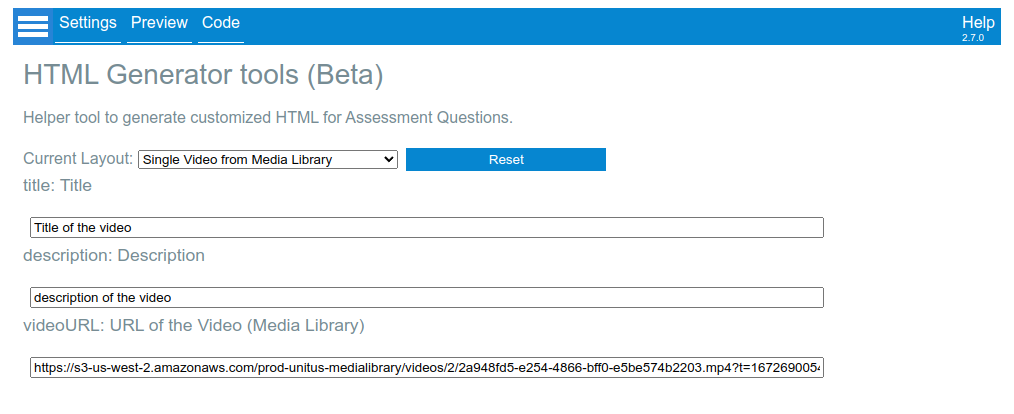
From the list of layouts, select “Single Video From Media Library”, and paste the Video URL. You can also customize the title and description that will appear over and under the video.
Step 3: Preview your layout
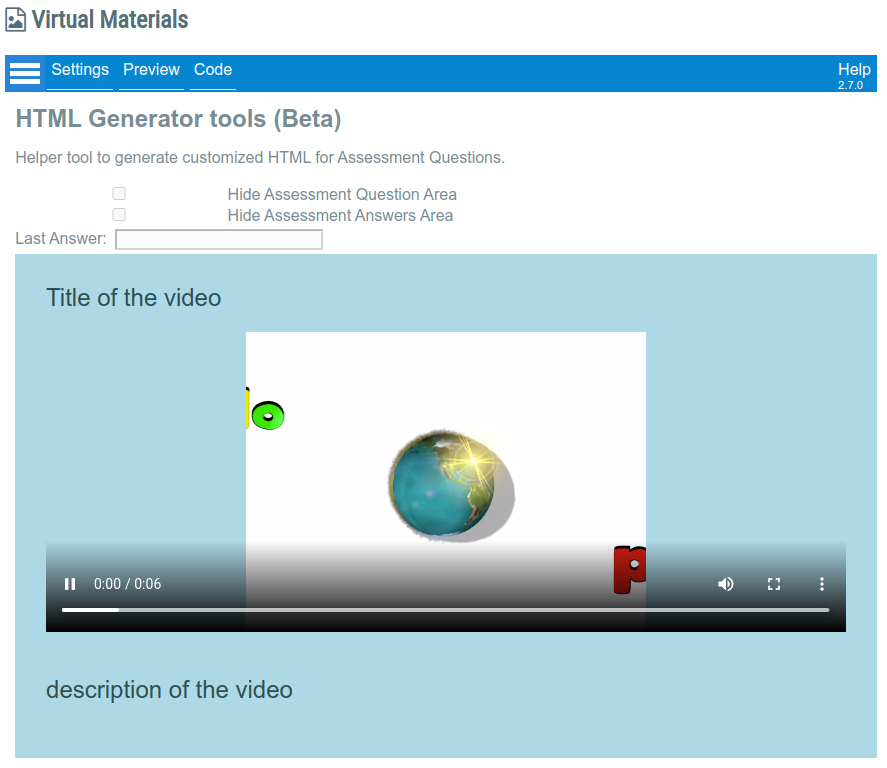
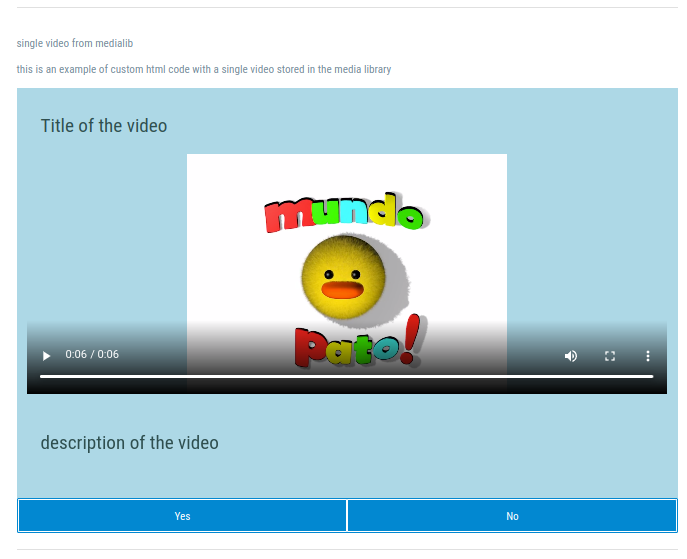
Click on Preview, and you will see your video and the texts:
Step 4: Copy the HTML code
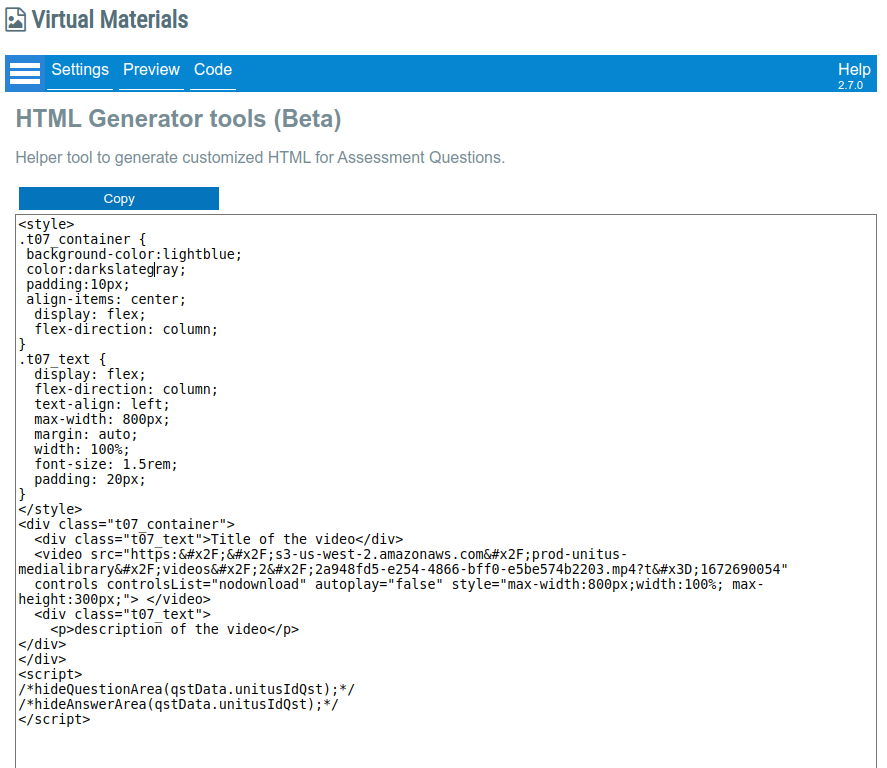
Now you can go to “Code” and use the “copy“ button to copy all the code to your clipboard.
Step 5: Paste the code into your Assessment’s Question
Create or edit a question in your assessment, and paste the custom code in the “Custom Code” text area (click the “Add Custom Html Code” button to expand it)
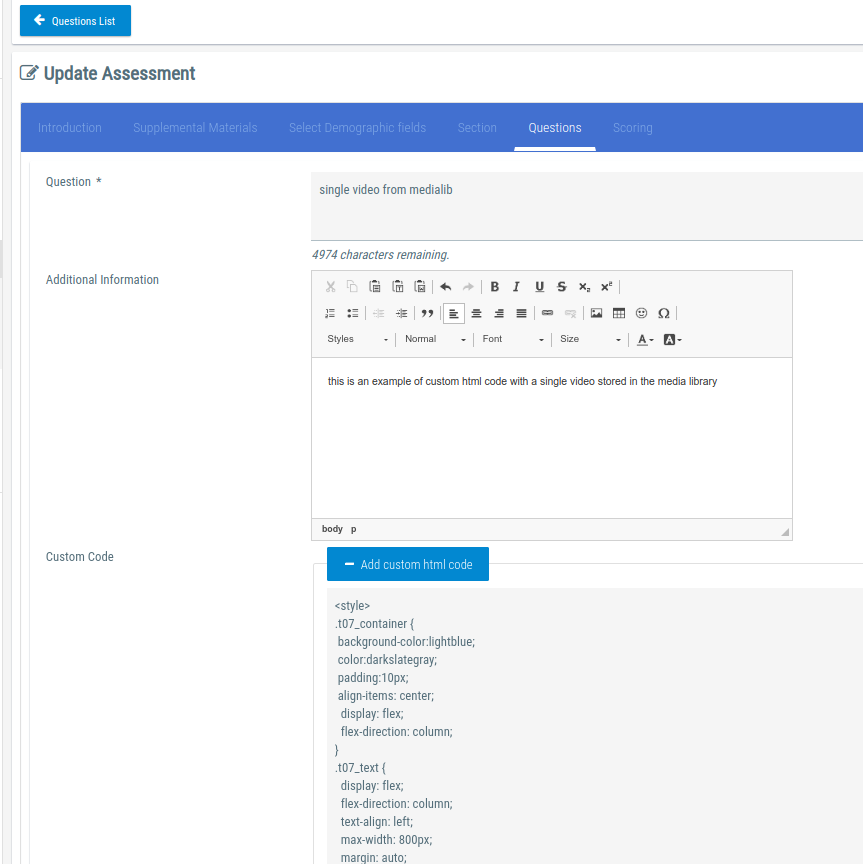
Step 6: Preview your assessment
Example 3: Multiple videos and interactive answers
In this example, we are going to explore more advanced features of the HTML Generator, like custom fields and interactive answers.
Step 1: Open the HTML Generator
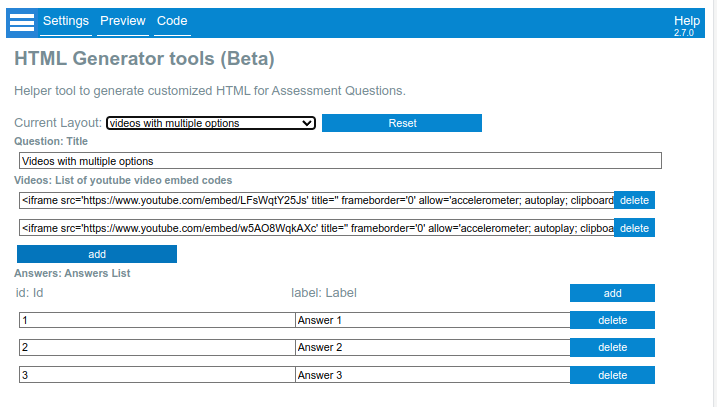
The HTML Generator screen offers a list of predefined layouts. The layout presented in the following screenshot, for example, offers the ability to embed many youtube videos in a row, and a set of answers in the bottom:
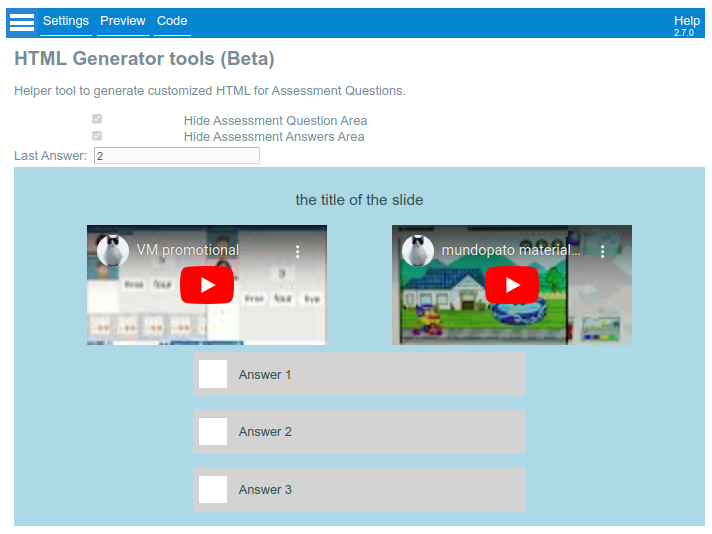
You can click on the option “Preview” to have an idea of how your layout will look when it is inserted into the assessment:
Step 2: configure the layout
Each Layout offers a different set of configurable options. In this particular example, we are removing one of the videos and one of the default answers, and we also customized the texts.
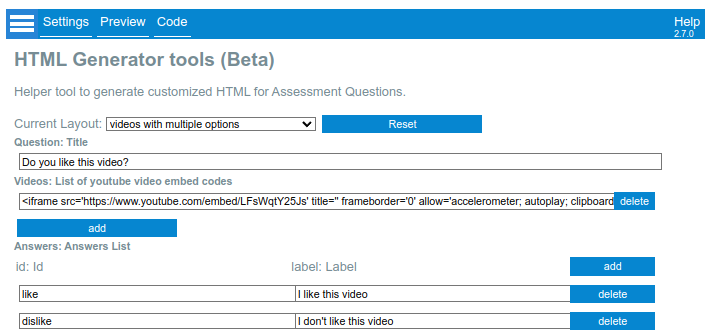
Note : In this layout, the label can be any text, but the id should match the answers expected in the assessment question (check last steps for more information).
If we go to “Preview”, it looks like this:
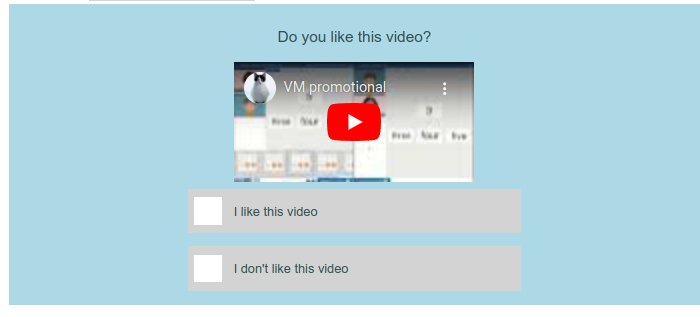
Note : This particular layout works with youtube videos, but you can also work with videos and audios stored into the Virtual Material Video Library.
Step 3: Copy the HTML code
Now you can go to “Code” and use the “copy“ button to copy all the code to your clipboard.
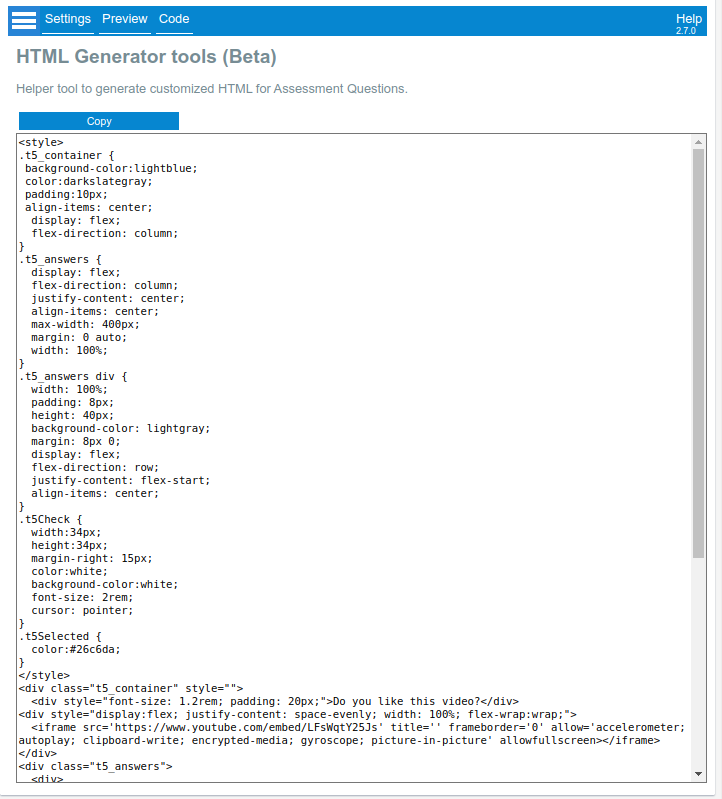
Step 4: Paste the code into your Assessment’s Question
Create or edit a question in your assessment, and pase the custom code in the “Custom Code” text area (click the “Add Custom Html Code” button to expand it)
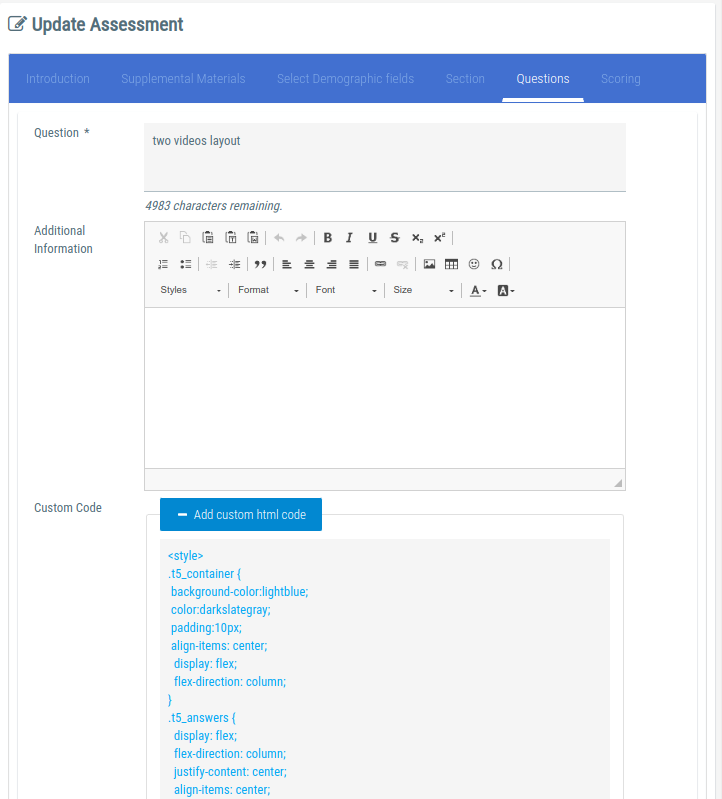
Step 5: Decide if you want to hide or show the question and answer areas
Custom HTML code has the ability to hide either the question or the answer areas during the assessment execution.
This is done through two lines of code that are inserted in the code that you copied.
If you slide down to the bottom of the code, you will find these two lines:
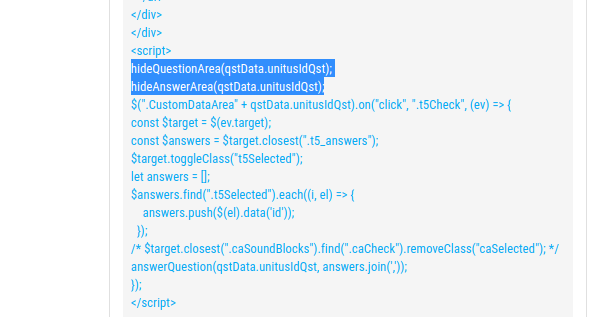
The first one, hideQuestionArea , is responsible for hiding the text of the question. You may want to hide the text if, for example, the text is duplicated in the HTML.
The second one, hideAnswerArea , is responsible for hiding the answer buttons. You may want to hide the answer buttons if and only if the interaction was designed to provide answers to the assessment.
In this example, both conditions are true: We already have the title of the question in the HTML and the HTML offers buttons that replace the assessment’s default buttons. That is why these two lines are present.
If you want to keep visible some of these areas, just delete the line from the code.
Let's compare how it looks with the lines and without them:
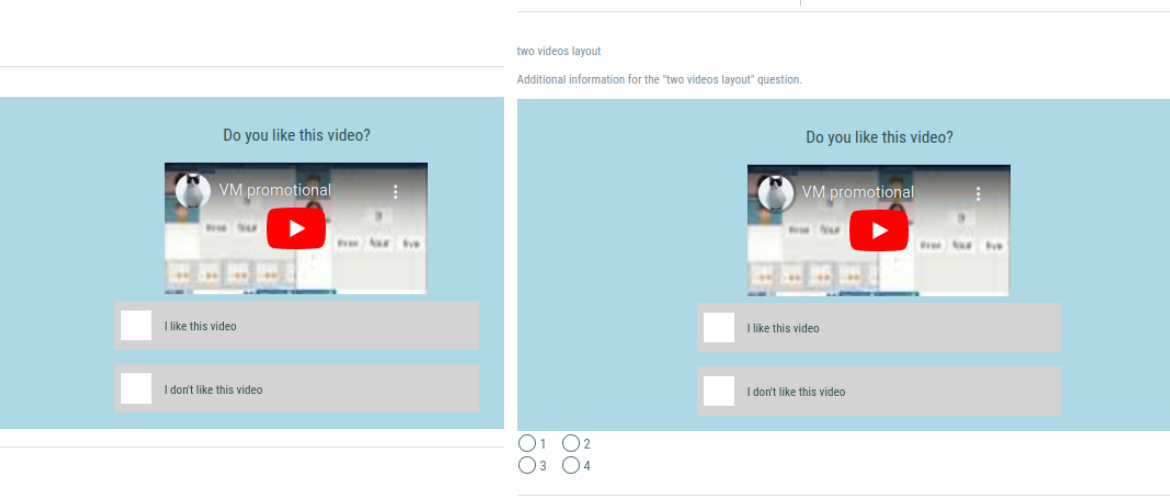
Only on the left the Title of the question, the Additional Question text, and the buttons of the Assessment are visible.
Step 6: Match the assessment answers to the HTML answers
Remember that in step 3 we defined the ID of the two options as “like” and “dislike”? Now we are going to set up the answers in the assessment to match those values:
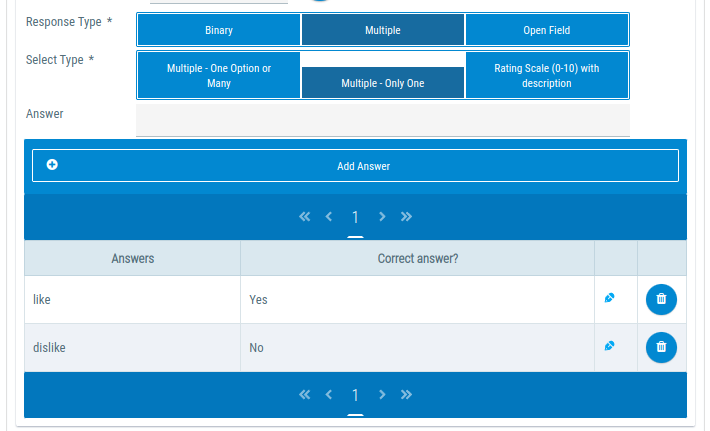
As you can see, we created answers with exactly the same text used in the “ID” column of the template that we choose for the example.
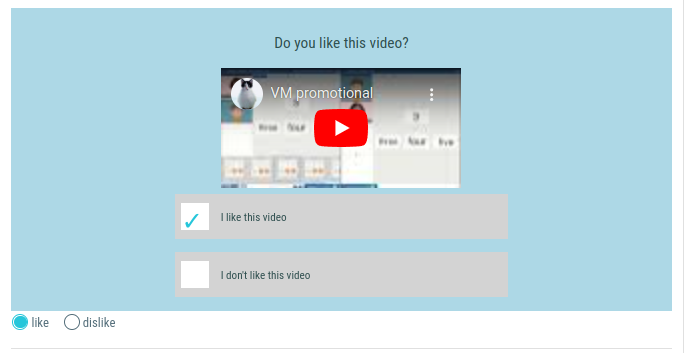
Now, if you preview your assessment, you will notice that when you click on the HTML options, the answer below is also highlighted:
Things to remember
- Each template in the VM Toolset’s HTML Generator is an example of the kind of interactions that you can create. We are going to extend the list with new templates over the time, so be sure to check it to discover new possibilities.
- If your media content is not stored in youtube, you can make use of the VM Toolset’s video library to upload it.
- Check the Virtual Materials Toolset samples and tutorials and consider if your questions can be presented as Flashcards Slides to increase engagement!
- If you don’t have developers in your team, and you need very specific interactions that are not included into the templates or can’t be implemented as flashcards, please contact us to provide further assistance.