To add a program to a client’s existing program list, go to the main menu, select “Programs” and select “Manage Programs”.
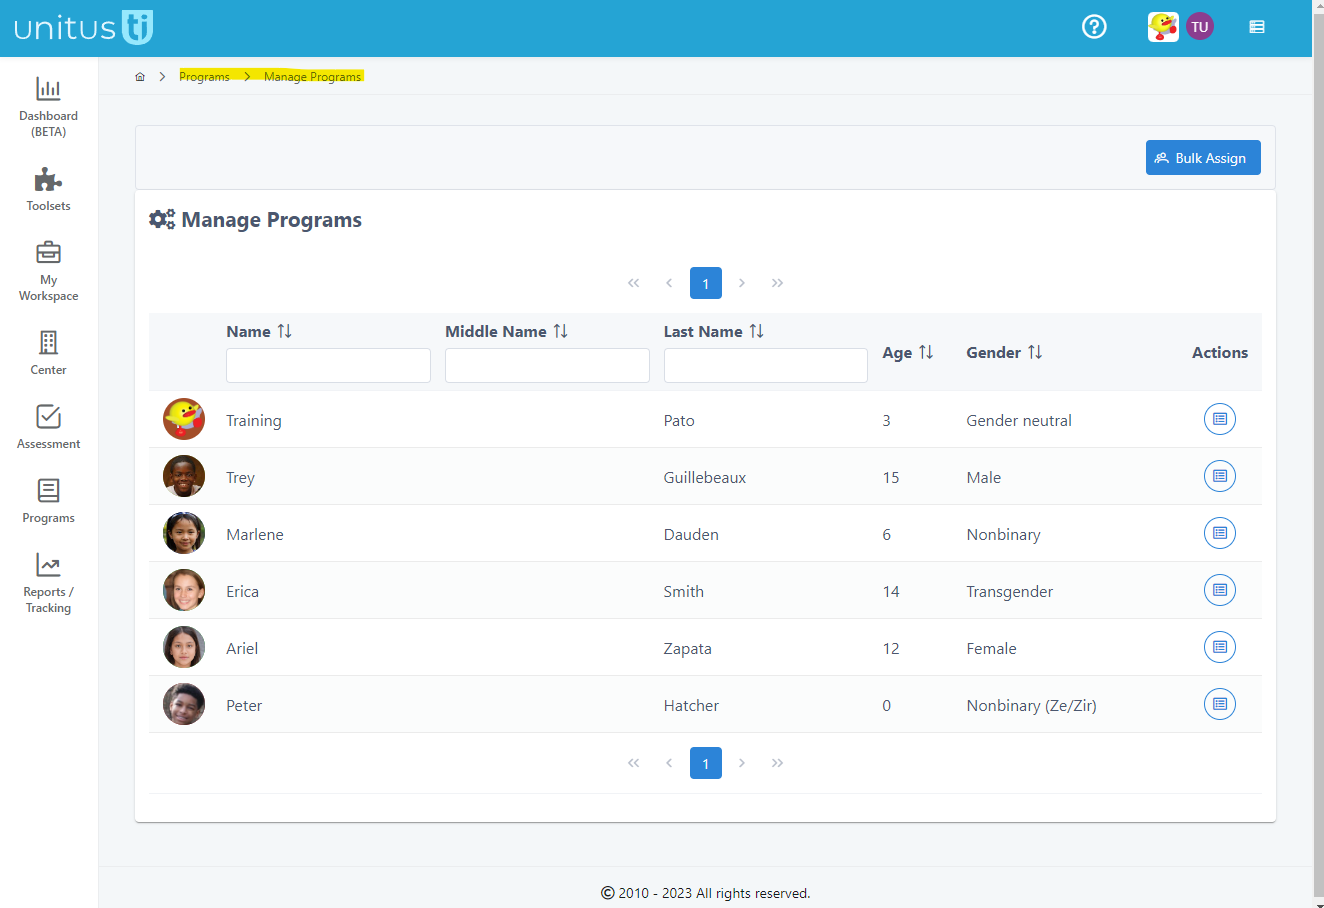
This will bring you to a page that shows all the clients you are assigned to. (Tip: if you don’t see your client here, check with your Administrator to see if you need to be assigned to them or if they need to be added in the My Clients area.) Choose the Actions button for the client you wish to add the program to.
Next, choose the list you want to add the program to. On this Program List Detail page, you’ll see all lists that have already been created for this client. If there is more than one, choose a list by selecting it from the tabs. While the list is selected, choose the Actions button, then “Add program to list”.
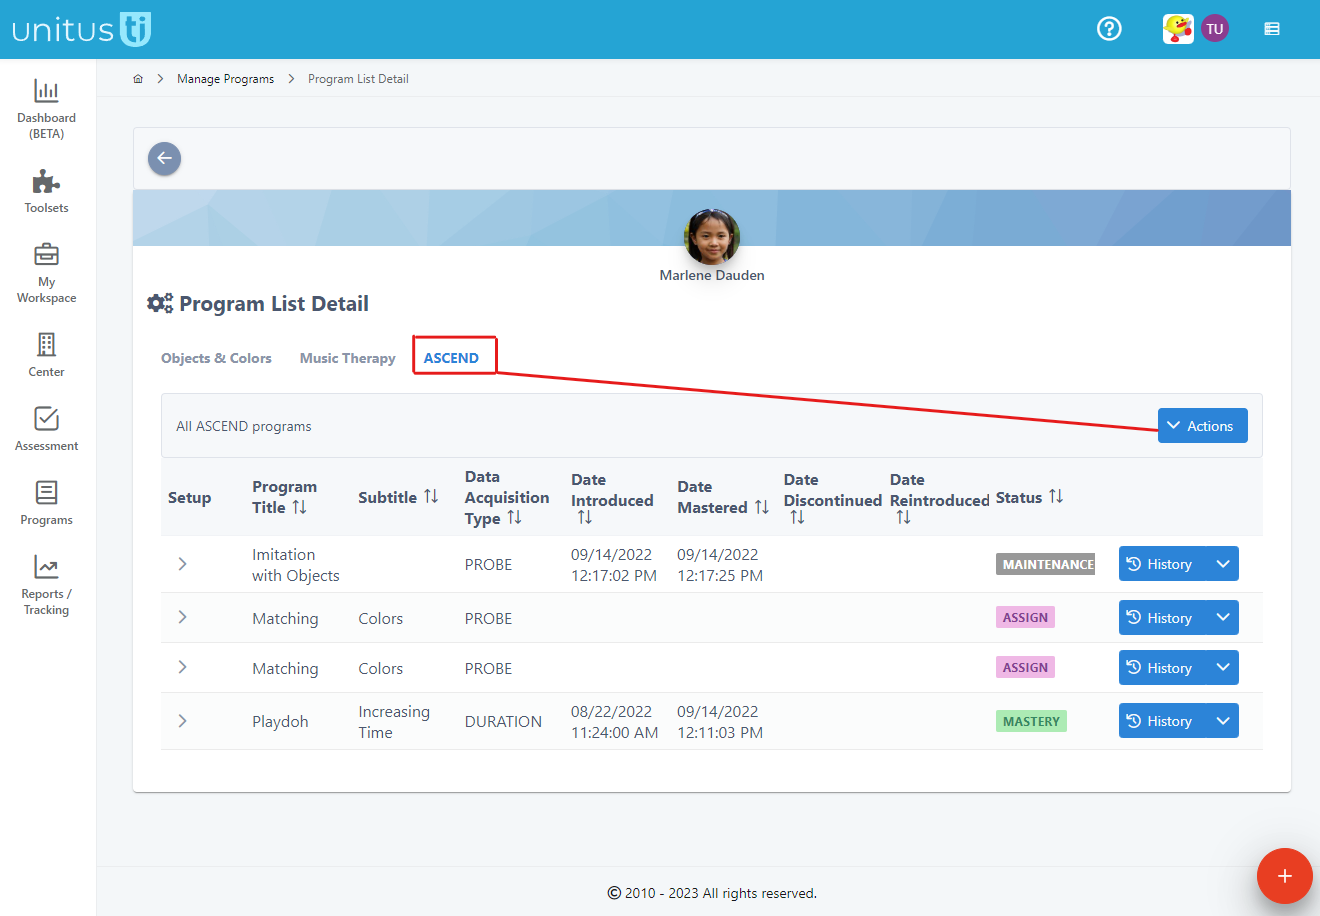
This will direct you to a page where you can search through the program templates available in your organization’s account.
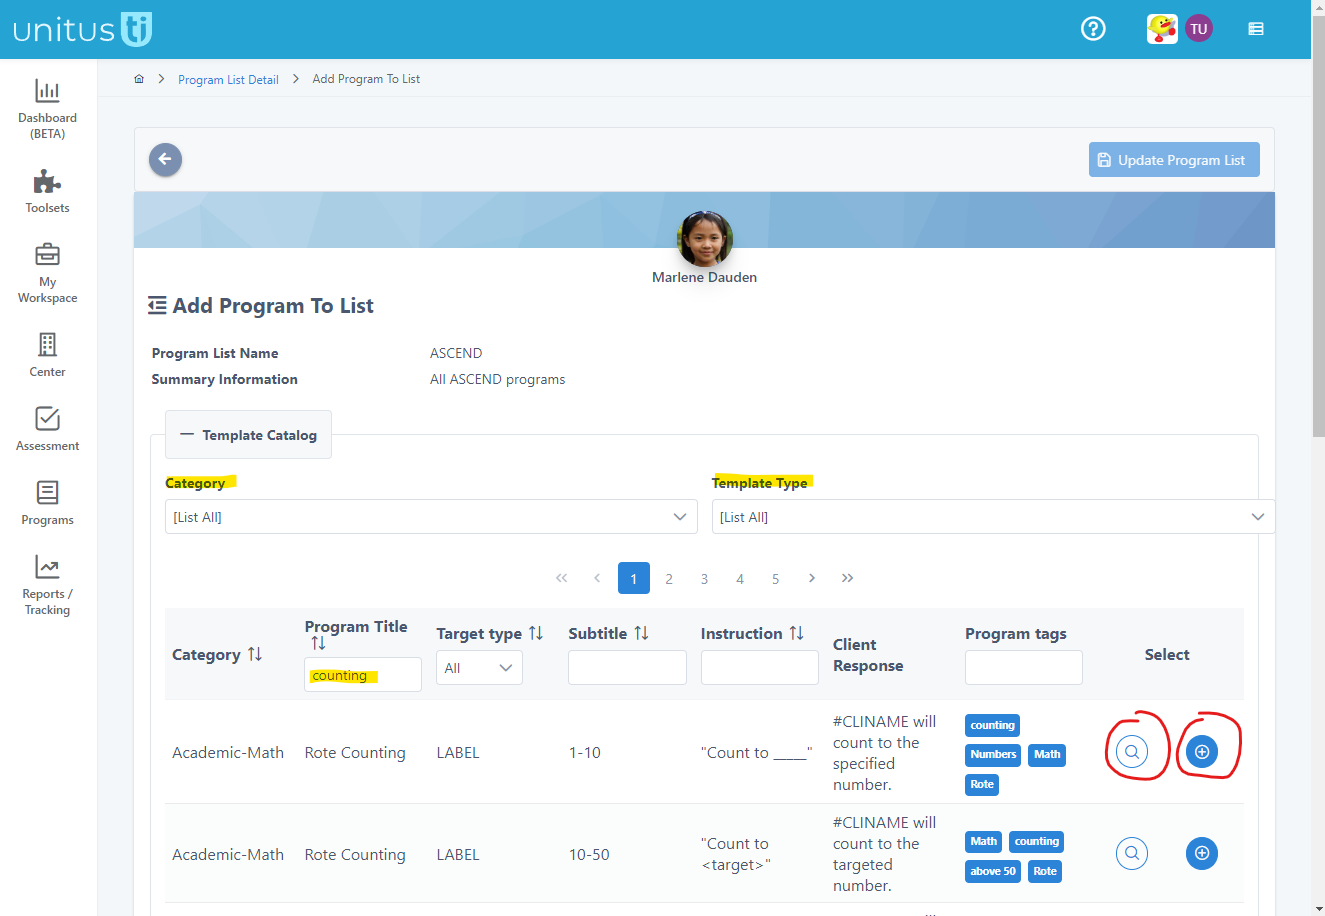
Choosing a program from the Add Program to List page:
If you have many templates, you can filter the list by using the Category or Template Type filters at the top. (Template types differentiate between program packages you may have subscribed to from the Marketplace or templates created by your organization, which are labeled “Custom”). You can search for a specific program using the search fields at the top of the columns or scroll through pages using the page numbers or arrows. To see more details about a program, select the preview button, and when you have found the program you wish to add, choose the Add button in the Select column, to customize the program configuration for this client.
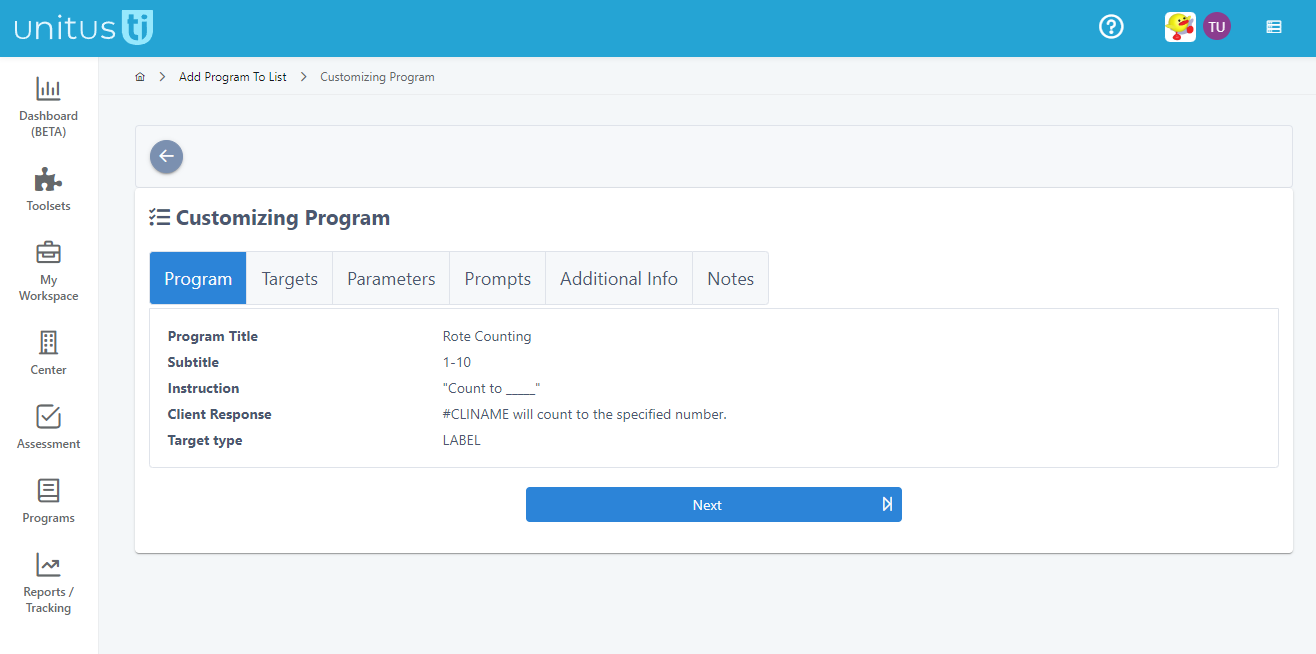
Customizing the program for the client
Now you can customize the program assignment for this client. Add targets by selecting them from the Targets Available list and moving them to the Targets Selected box.You can do this by clicking and dragging them, or selecting and using the arrows, and use the Add All and Remove All arrows to quickly move them all in bulk. Search for specific targets using the type-in search field. You can order them here, as well, however the data acquisition type you select in the next step will ultimately determine how targets are presented when running the program.
Choose a data acquisition type from the list. Note that the parameter options, including mastery criteria, will change depending on the data acquisition type you choose, and the data acquisition types in this selection list will change depending on the target type set by the program template. In this example, the template has a target type of Label, so my options include the data acquisitions types in this list. For this example I will choose a simple data acquisition type of Probe and set up the mastery criteria settings that determine how many trials will be run per session, what success percentage is needed over how many consecutive sessions, and how many targets will be shown in a session from the list I chose in Targets tab. For a complete walkthrough of how each data acquisition type works in UnitusTI, please review the help videos available in the Help Center.
Program mastery is determined by the combination of these configuration settings and tells the system when a program no longer needs to be run and optional program maintenance can be enabled.
In the Additional information tab, additional notes can be made, such as behavior reduction goals and strategies to be aware of or skill acquisition goals and prompt procedures. This information is presented to the person running the program. Other customization tabs, such as Prompts, will be available here depending on the data acquisition type chosen. An additional custom note can be created in the Notes tab. This note will also be visible to the person running the program. When you are finished, click Save. Continue adding programs from the available program template catalog, and when you’re ready, click Update Program List to save. You can go back to the list, to see that the program has been added to that client’s program list.
As a reminder, access to the functions within UnitusTI is determined by the security role or roles given to you by your account administrator.