Goals and objectives, in the form of program templates, can be assigned to clients by creating program lists in Manage Programs. These program lists can later be executed in the Run Programs area for the purpose of recording progress on those goals and objectives. This article will walk through how to assign programs to your clients for this purpose.
Create a new program list for a single client:
Customizing the Program Assignment
Assigning a Program to Multiple Clients
To start assigning programs to a client, navigate to the main menu, select Programs, then Manage Programs.
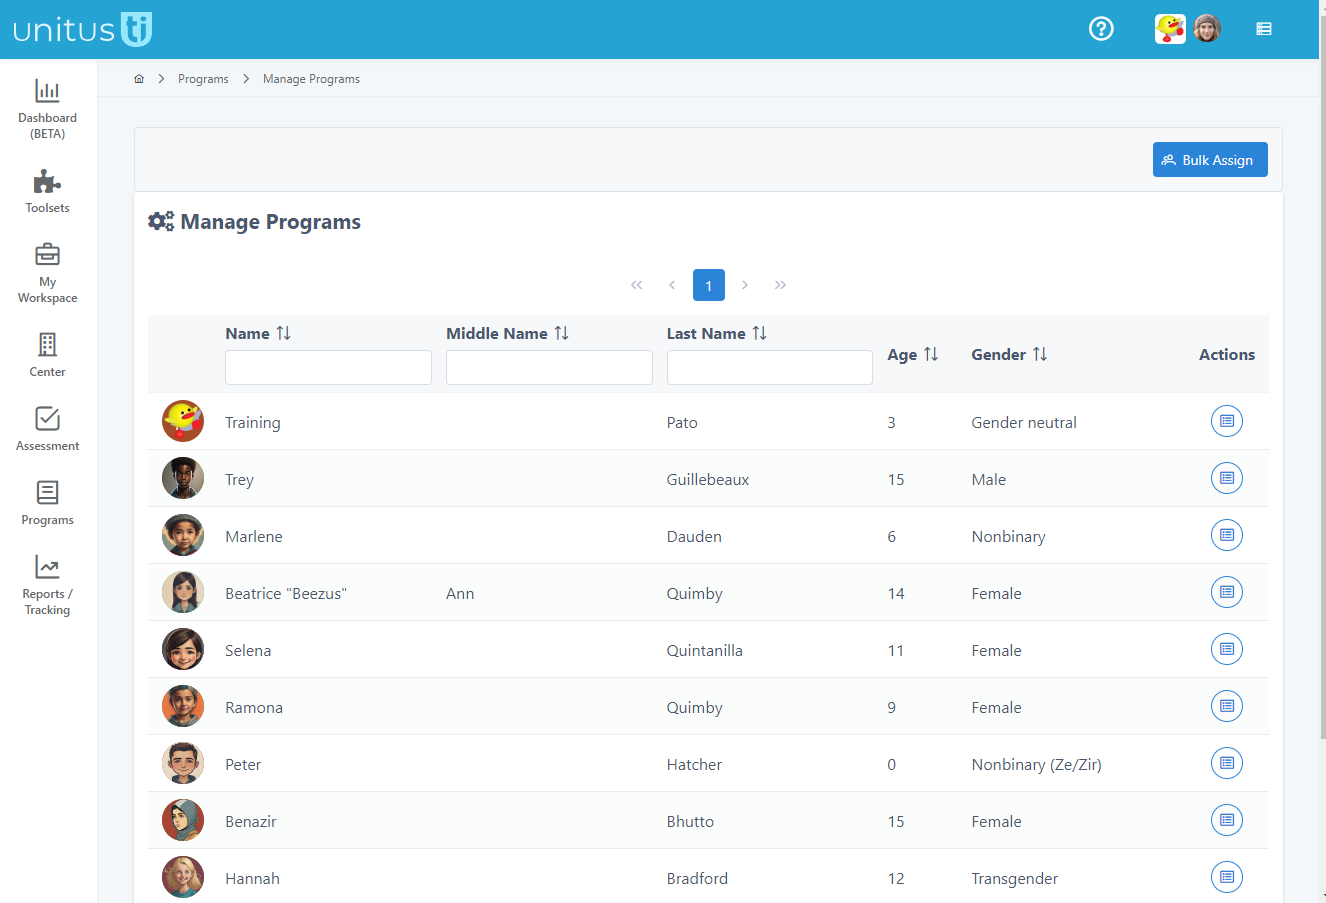
This will bring you to a page that shows all the clients you are assigned to. If you don’t see your client here, check with your Administrator to see if you need to be assigned to them or if they need to be created in the My Clients area. From this page, you can either bulk assign a program to multiple clients at once using the same configuration or assign a program to an individual client. (Note: in both cases, after a program is assigned, it is managed individually for each client in their Program List Detail page in Manage Programs.)
Create a new program list for a single client:
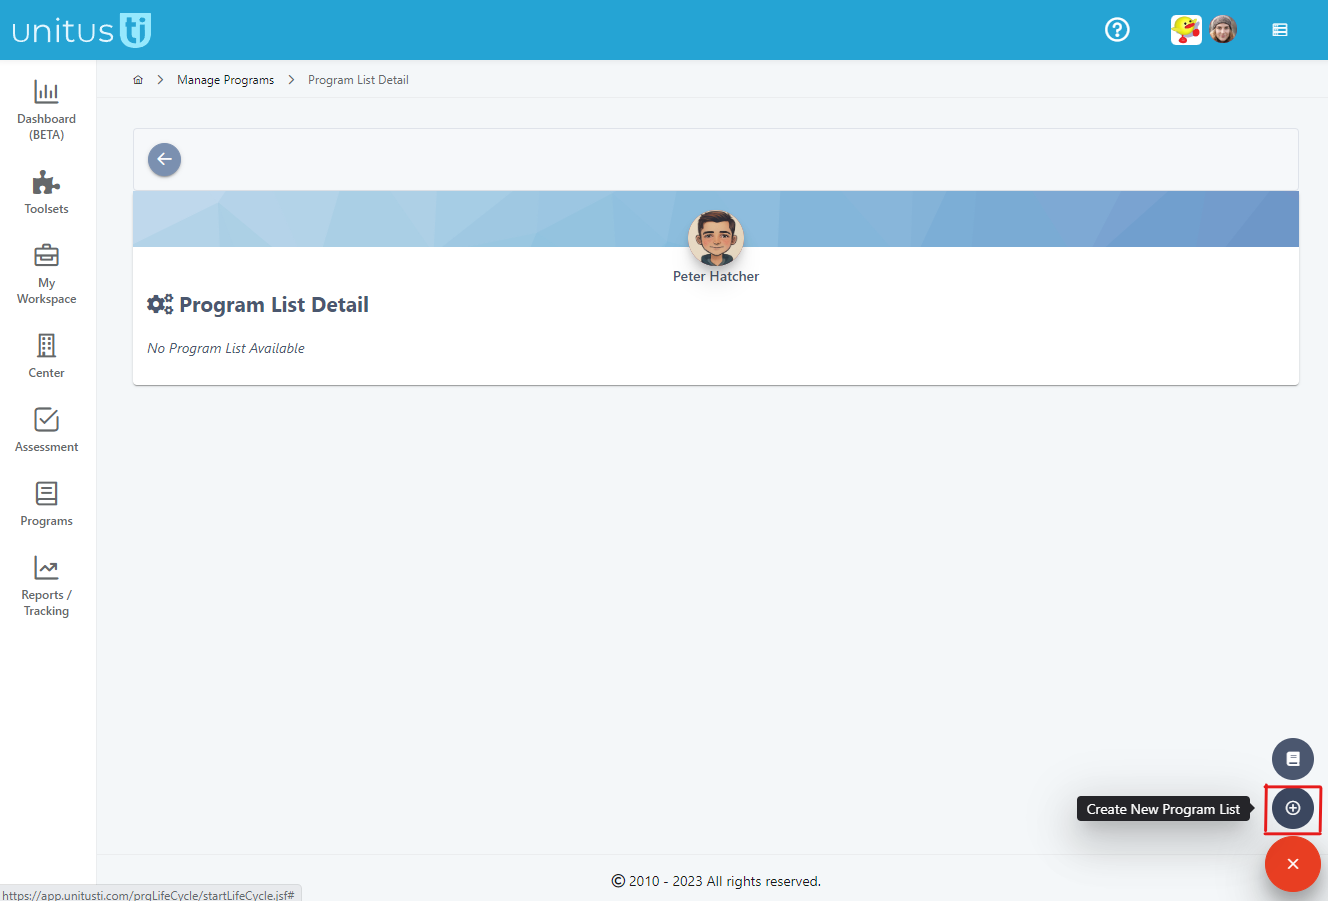
Select the client you want to assign a program to using the button in the Actions column. In the client’s Program List Detail page, select the red button at the bottom of the page, and then select the Create New Program List button.
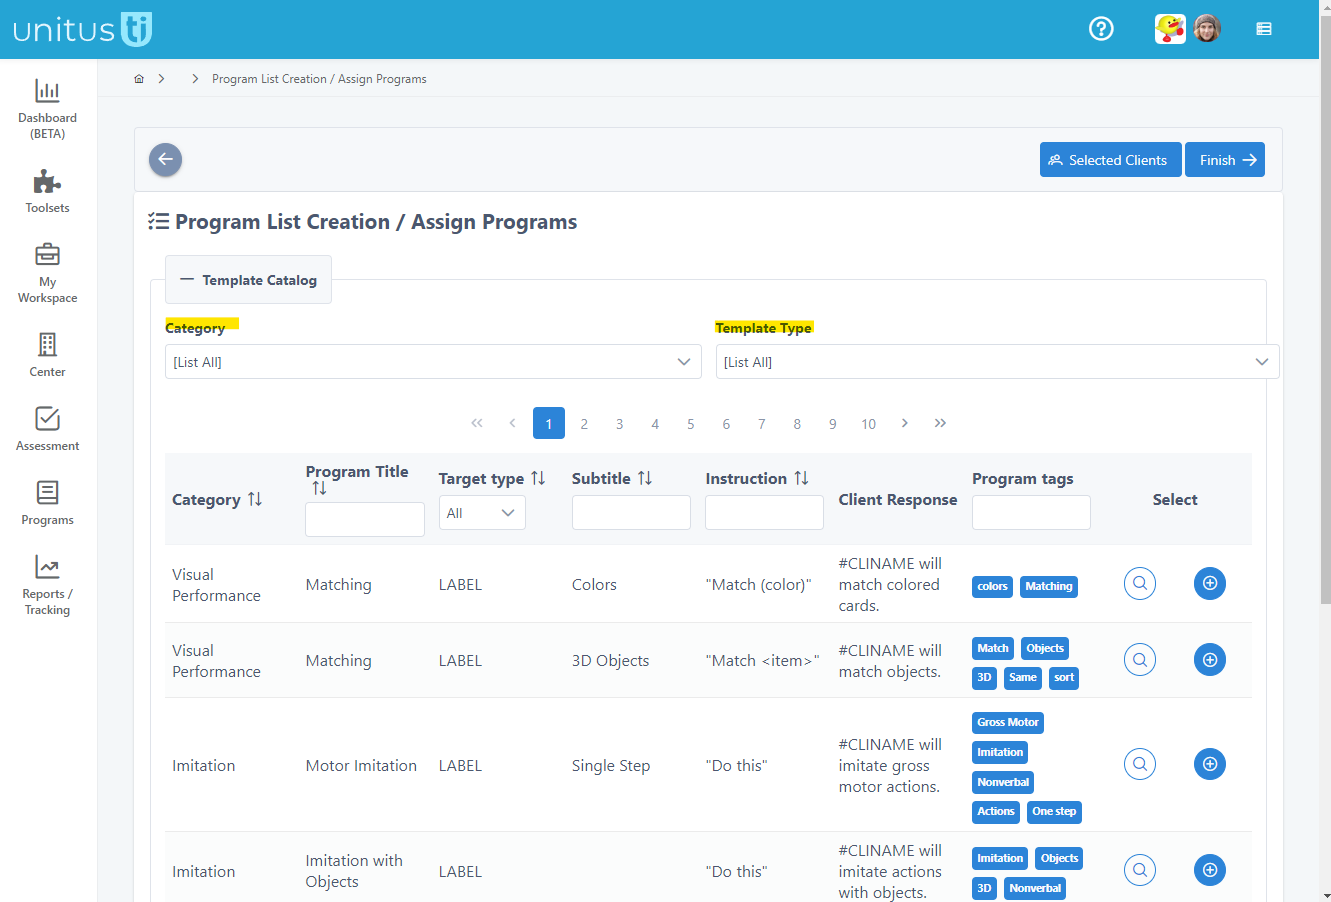
This will direct you to a list of program templates available in your organization’s account. Program templates can be created in the Program Templates area or subscribed to from the UnitusTI Marketplace. If you have many templates, you can filter the list by using the Category or Template Type filters above. (Template types differentiate between program packages you may have subscribed to, which are labeled with their Marketplace title or templates created by your organization, which are labeled “Custom”). You can search for a specific program using the search fields at the top of the columns or scroll through pages using the page numbers or arrows. To see more details about a program, select the preview button, and when you have found the program you wish to add, choose the Add button in the Select column.
Customizing the Program Assignment
Now you can customize the program assignment for the client.
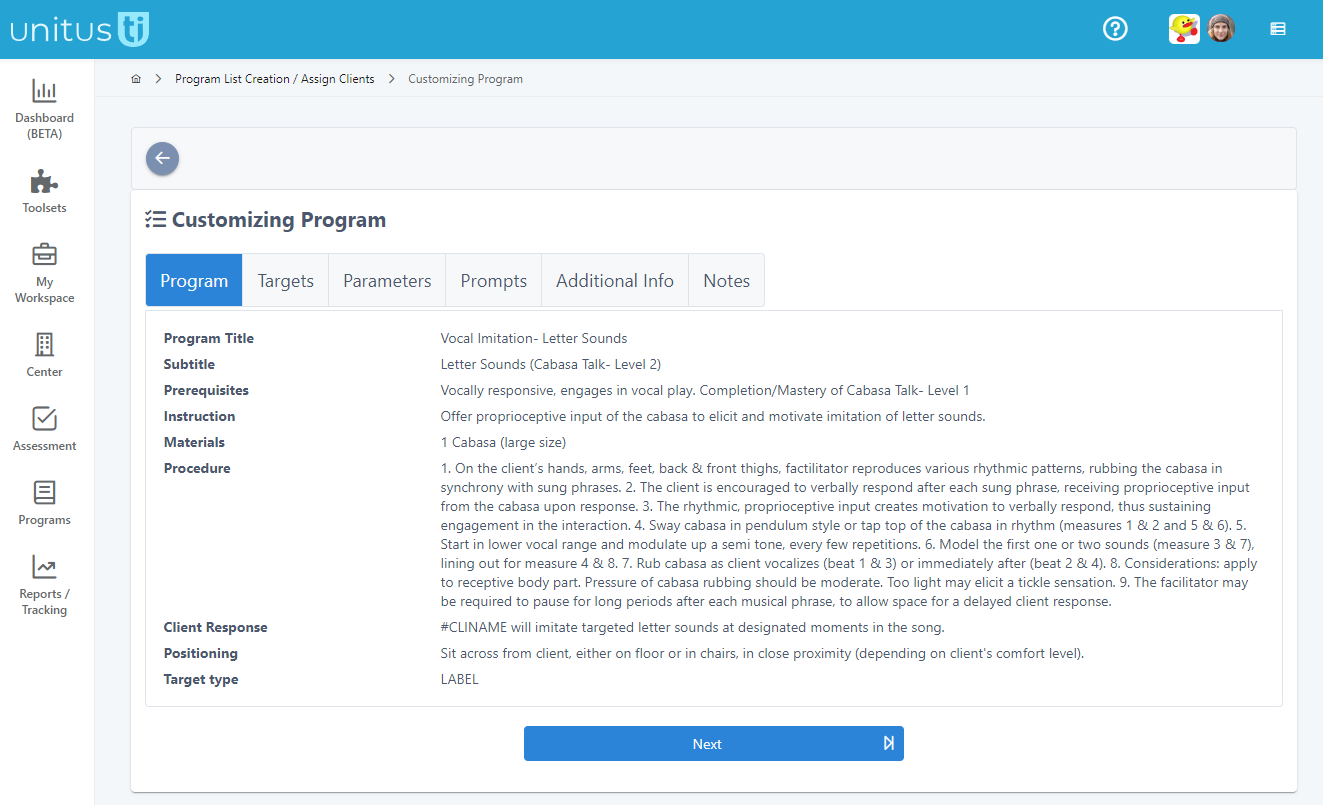
Program tab: Review the program information, including the expected instruction method and response from the client, and any other information helpful to assigning the program. Fields in this screen are determined by the author of the program template; each template may include different fields and information. (Note: hashtags are placeholders that will display client details in the Run Program and reporting screens; for example #CLINAME, as seen in the example screenshot above, will display the first name of the client when running the program.)
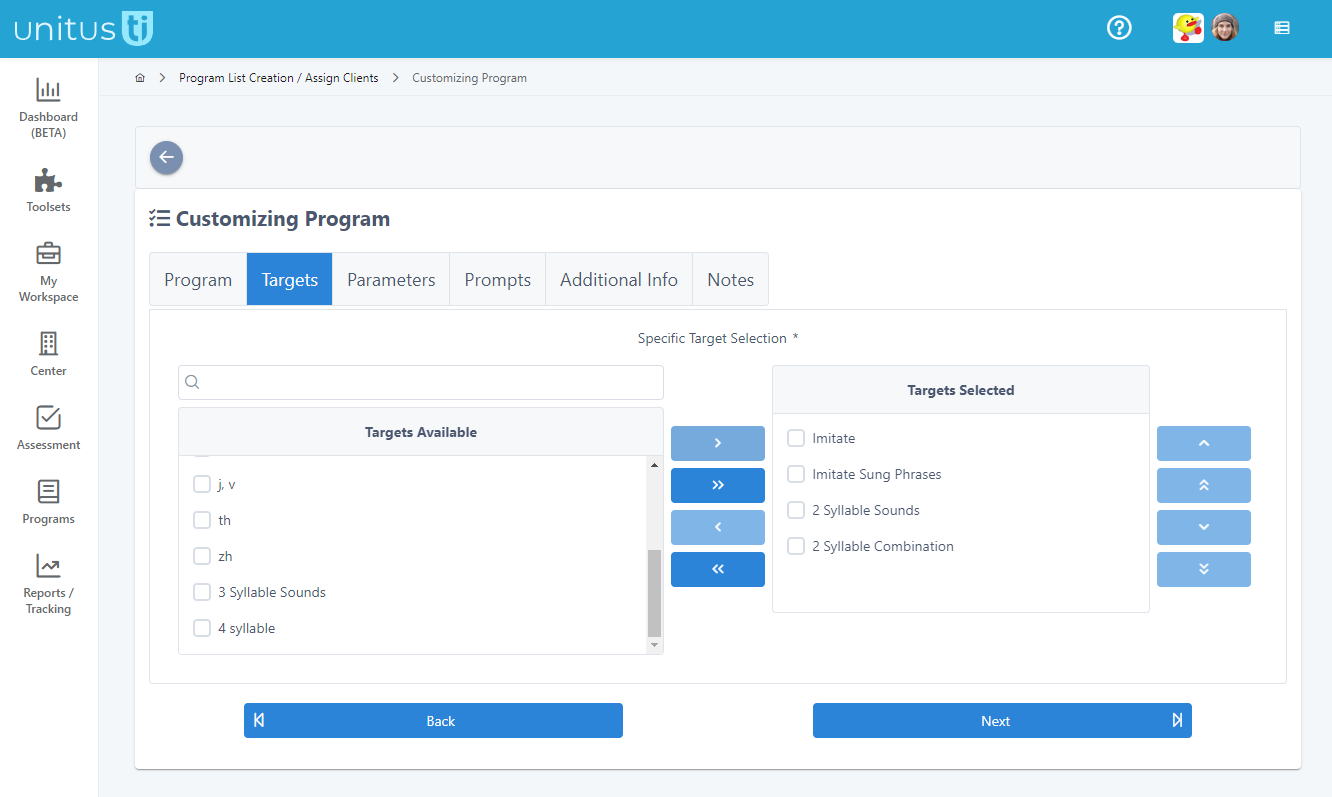
Targets tab: Add targets by selecting them from the Targets Available list and moving them to the Targets Selected box.You can do this by clicking and dragging them, checking the box and using the blue arrows, use the Add All and Remove All arrows to move them all in bulk, and search for specific targets using the search field. In the Targets Selected box, you can order them how you’d like them to appear, by selecting, clicking and dragging or using the arrow keys. Note that the data acquisition type you select in the next step will ultimately determine how targets are presented when running the program. Targets are the measurable objectives within a goal and you can choose how many you wish to assign and later edit your target assignment from the client’s Program List Detail page.
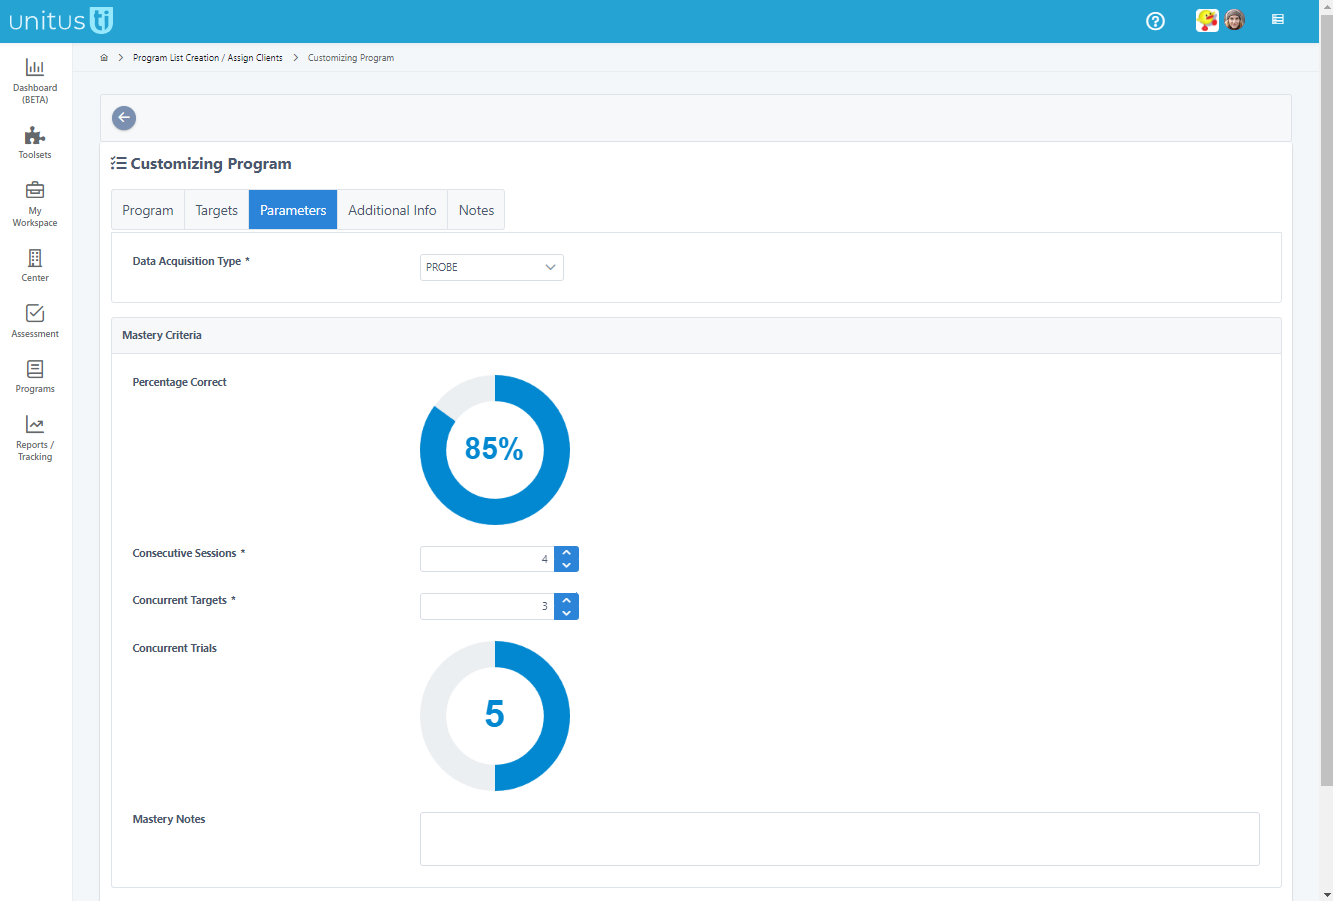
Parameters tab: Next, choose a data acquisition type in the Parameters tab, from the list. The data acquisition type determines how you collect data when running the program. For a complete walkthrough of how each data acquisition type works in UnitusTI, please review the help videos available in the Help Center. Note that the parameter options, including mastery criteria, will change depending on the data acquisition type you choose, and the data acquisition types available in this list will change depending on the target type set by the program template. In this example, the template has a target type of Label, so the options include the data acquisitions types in this list. For this example I will choose a simple data acquisition type of Probe and set up the mastery criteria settings that determine how many trials will be run per session, what success percentage is needed over how many consecutive sessions, and how many targets will be shown in a session from the list I chose in Targets tab. (Tip:“Concurrent trials” means the number of trials run per target each session. Example: 3 targets and 5 concurrent trials will result in 15 trials for the session, or 15 opportunities for the targets, total.)
Program mastery is determined by the combination of these configuration settings and tells the system when a program no longer needs to be run and optional program maintenance can be enabled. Optional mastery notes can be added in the Mastery Notes field, if you wish, for the therapist running the program to view.
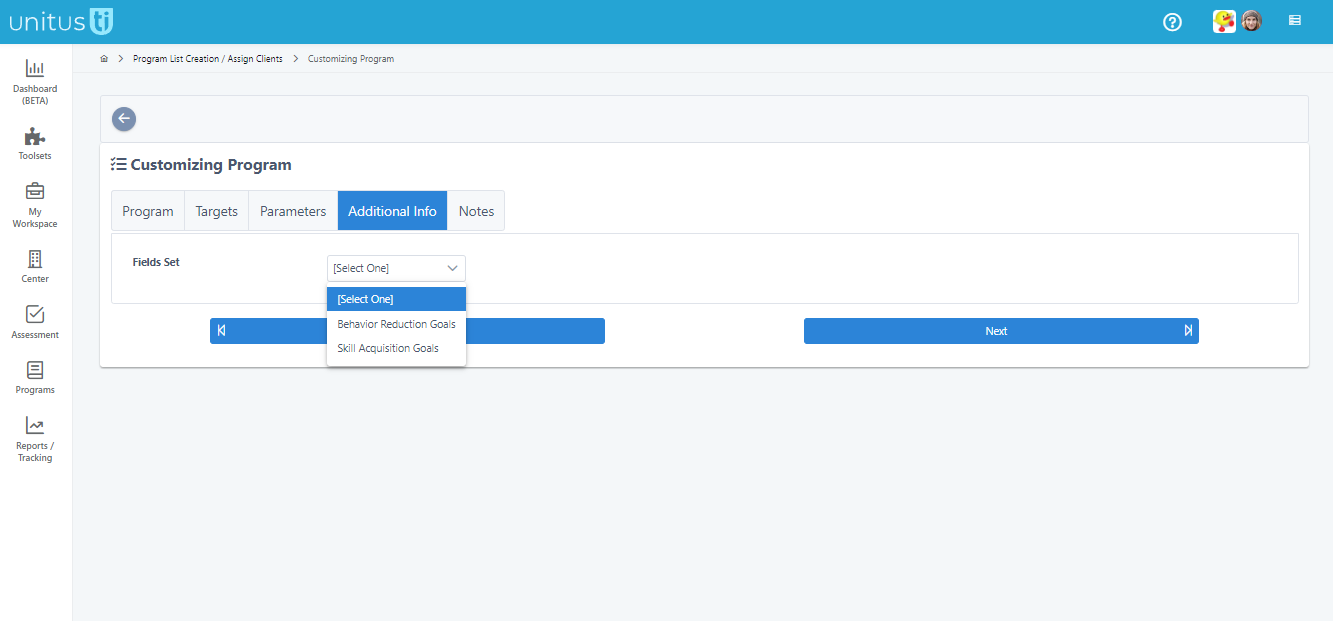
Additional Info tab: I n the Additional information tab, additional notes can be made, such as behavior reduction goals and strategies to be aware of or skill acquisition goals and prompt procedures. This information is presented to the person running the program.
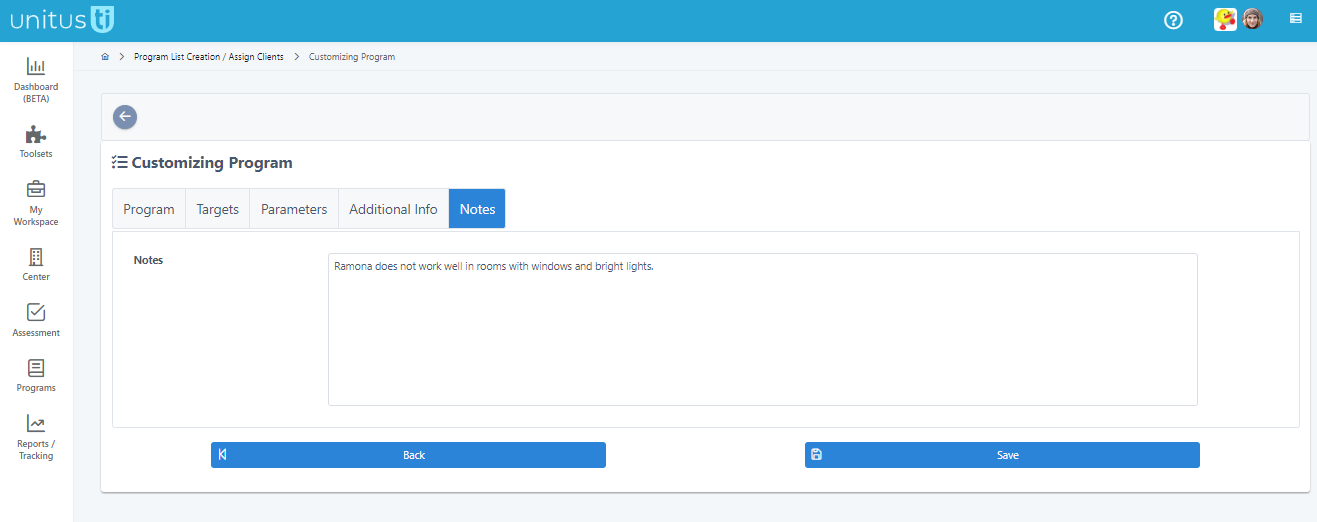
Notes tab: An additional custom note can be created in the Notes tab. This is optional, and the note will be visible to the person running the program.
Additional tabs: Other customization tabs, such as Prompts, Scoring Criteria, etc., will be available here depending on the data acquisition type chosen. All customization options can be learned about in the related DAT (Data Acquisition Type) help article.
When you are finished, click Save.
Reviewing and Saving the List
After saving the customizations for a program, you’ll be redirected to the template catalog, where you can continue adding programs as you wish. Tip: Since progress is not saved until you finish, it’s recommended that you save the list after adding one program and then add programs to this list as needed after it’s saved.
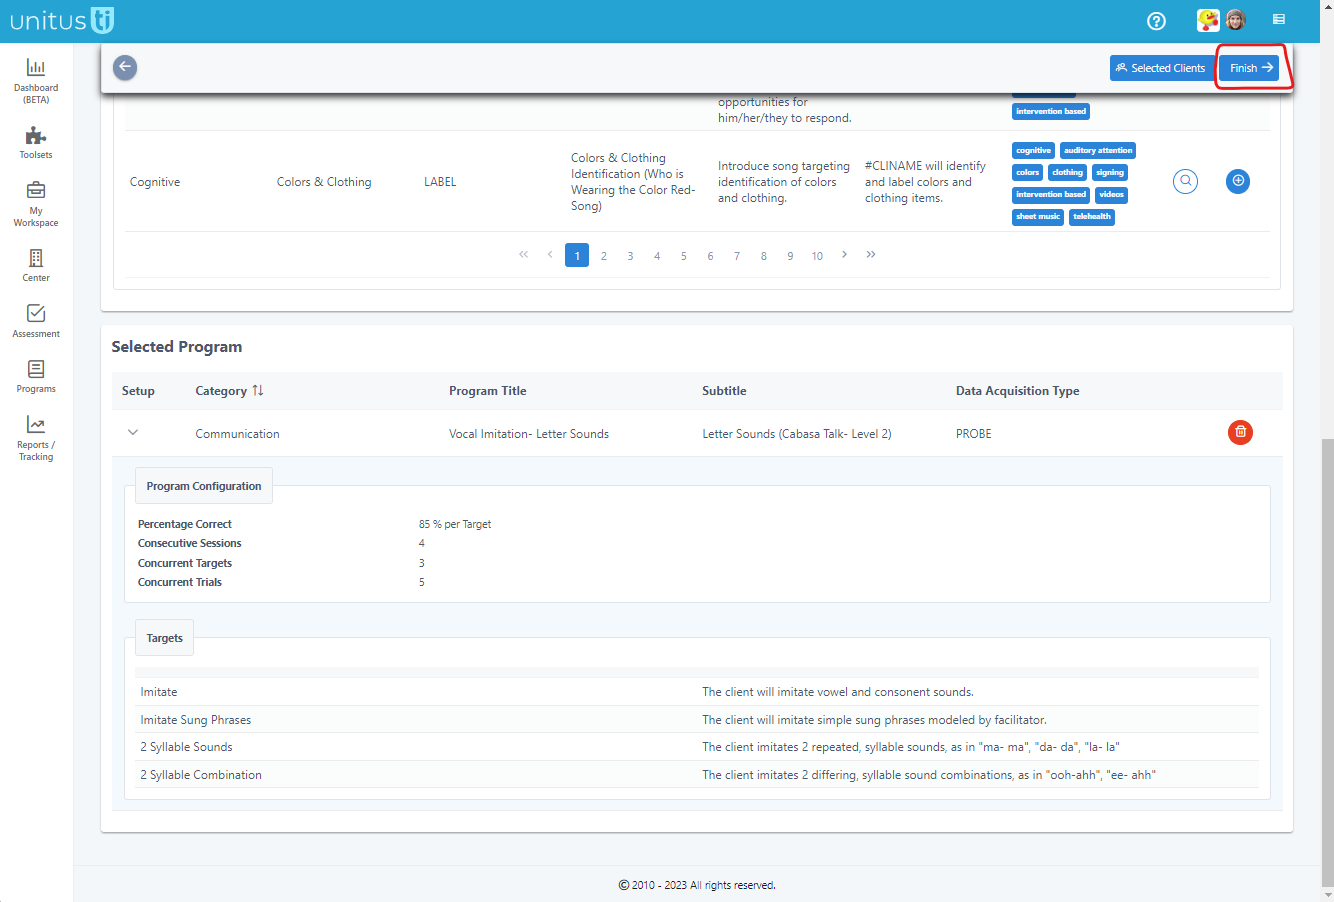
Below the catalog list, the Selected Program area displays the program(s) you have customized. Use the trash can icon if you wish to delete a program. The Selected Clients button at the top of the page will show you the client you are assigning the program to. Select the Finish button at the top of the page to save and name your program list.
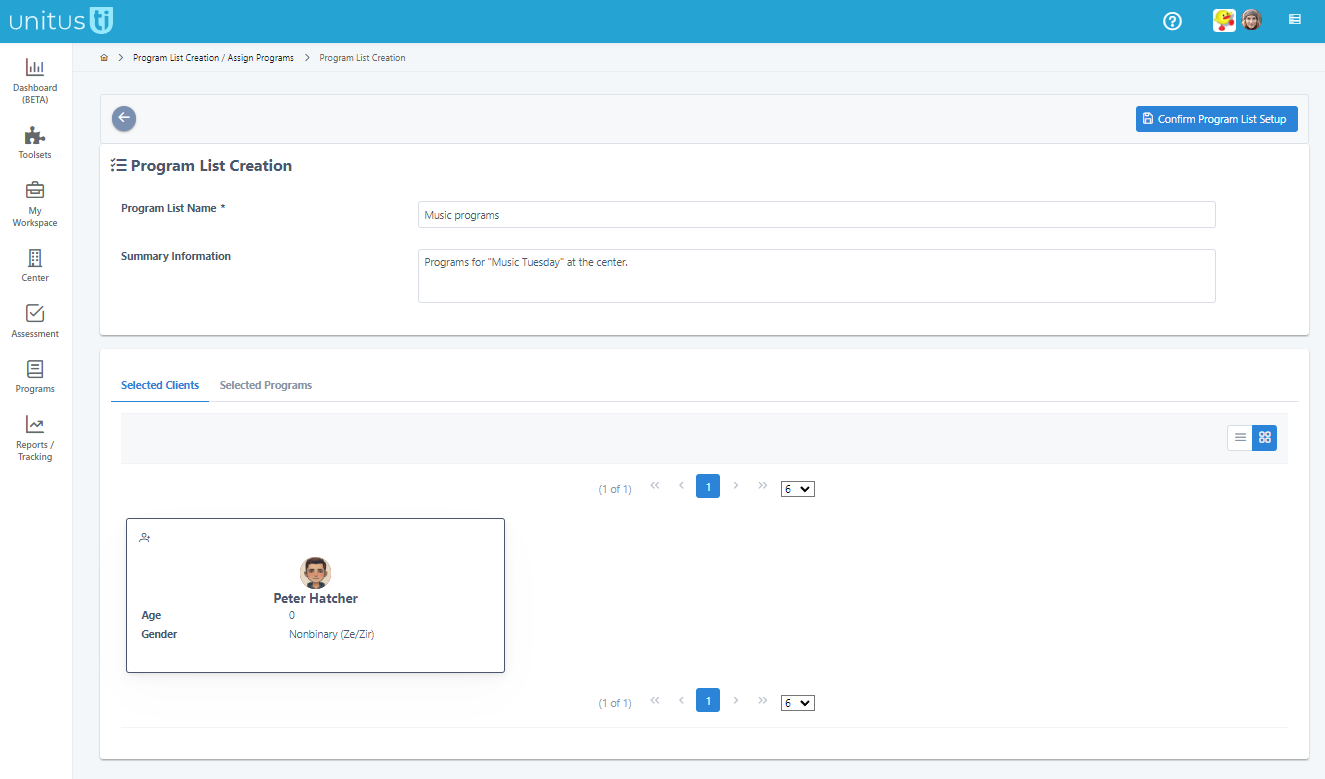
In the next screen, choose a name for the list and an optional description. You can review once again the client and programs before saving. To complete the list setup, click the Confirm Program List Setup button.
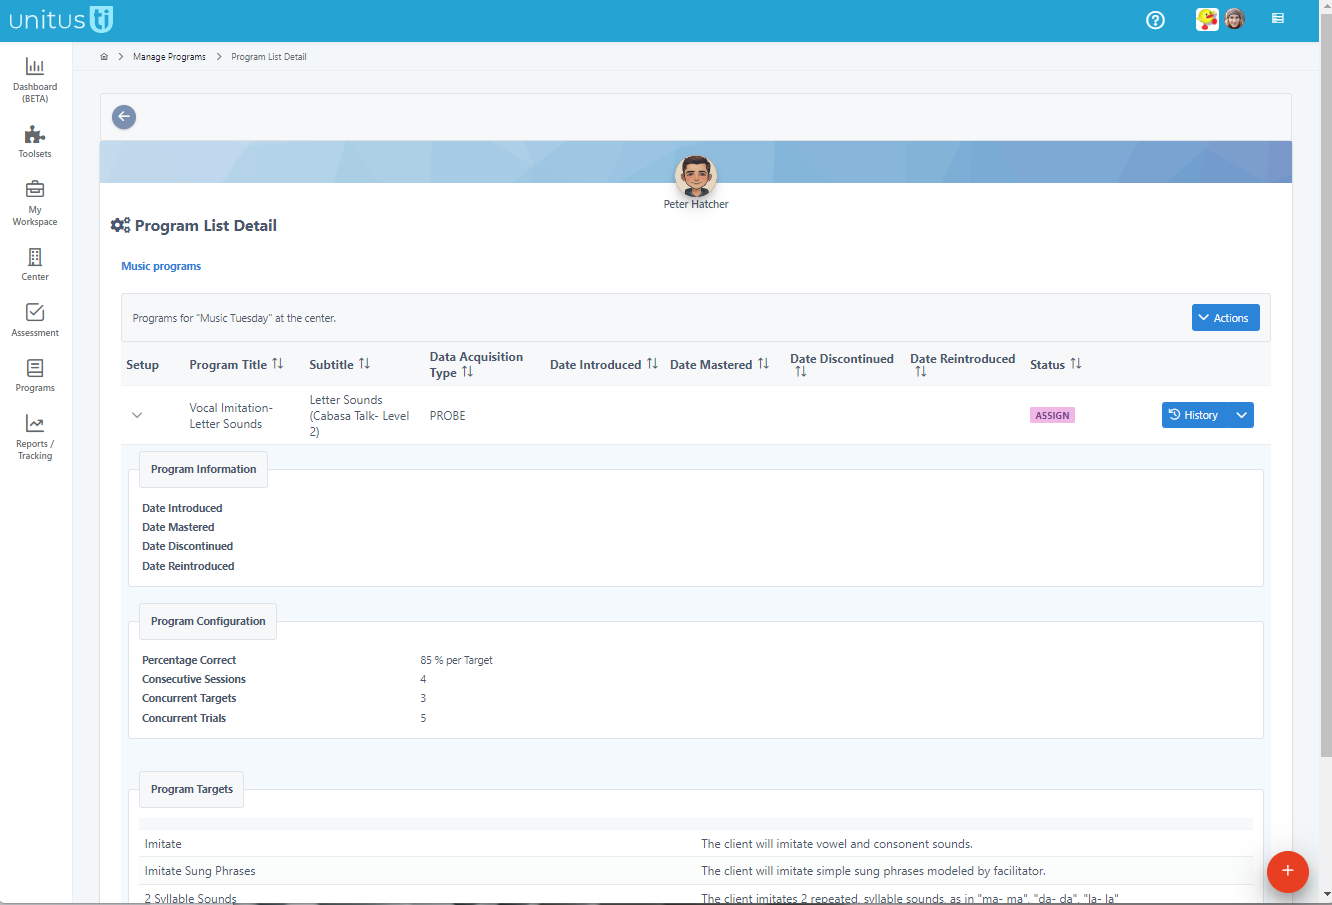
Now your list is saved and you can view it in the Program List Detail page for the client. If you have multiple lists, the names will be listed at the top as tabs, and all programs assigned to those lists are visible below. Select the down facing arrow in the Setup column to see the program details, implementation information (i.e. dates introduced, mastered, etc.), program configuration and targets selected.
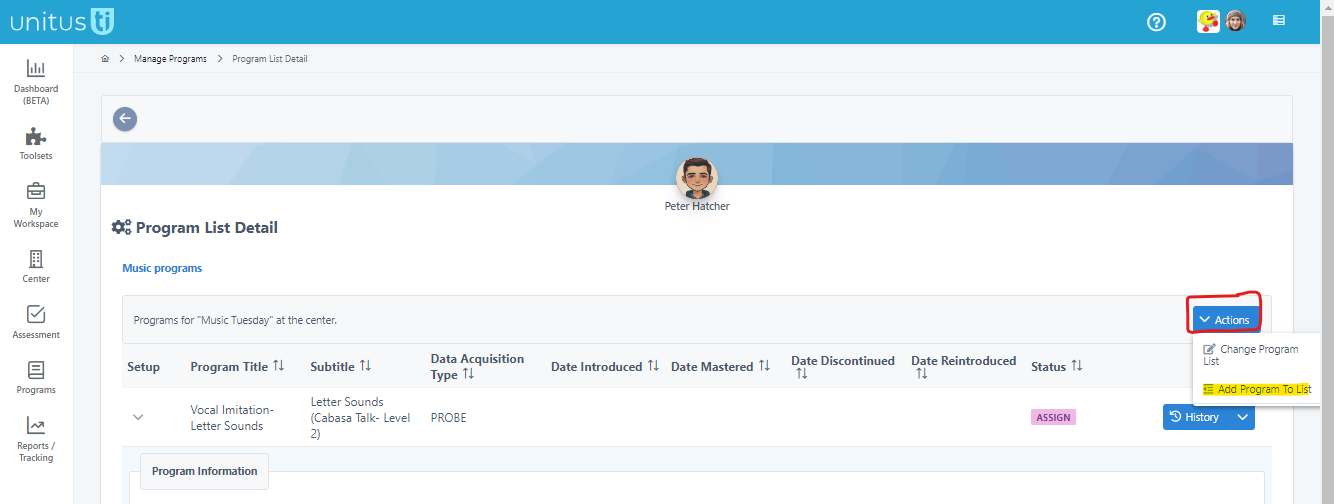
Tip: to add more programs to an existing list, select the list, then Actions, then Add Programs to List, and walk through the same process of choosing your program and assigning it to the client.
Bulk Assign: Assigning a Program to Multiple Clients
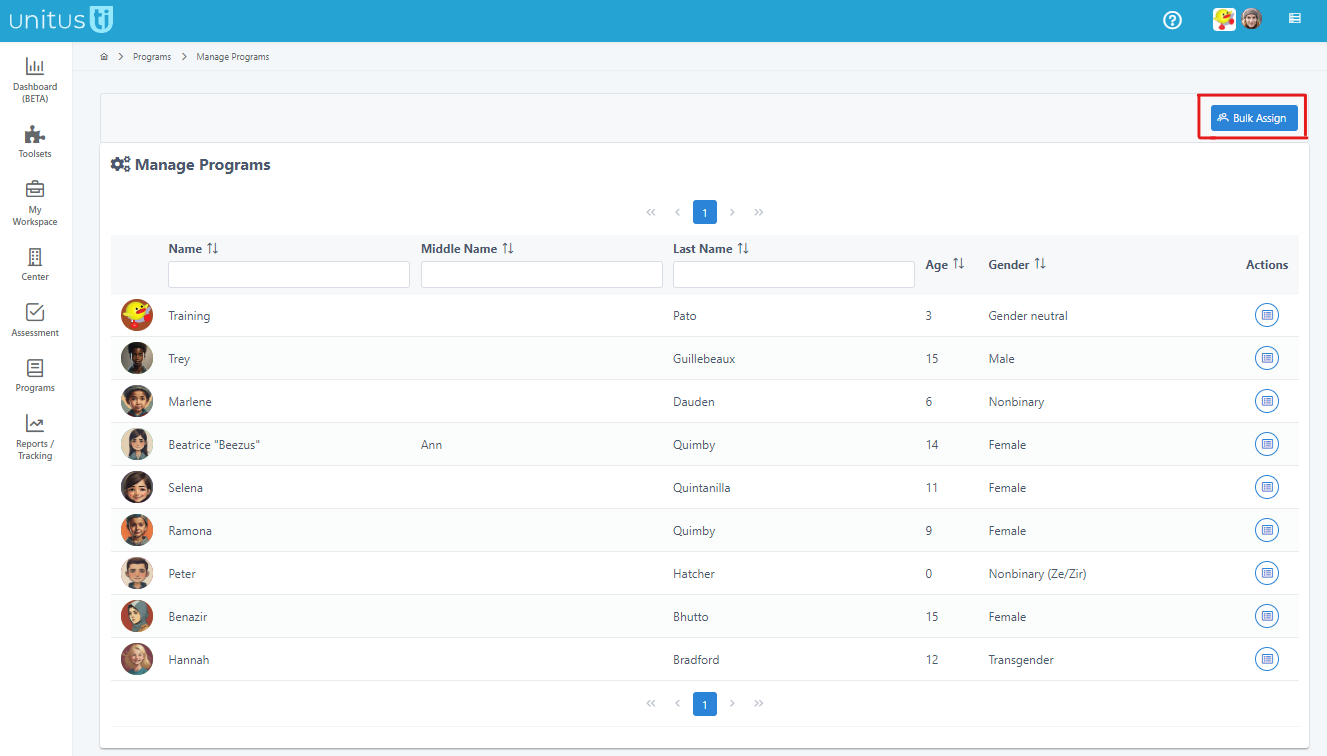
From the main Manage Programs screen, you can assign a program to multiple clients at the same time, with the same configuration, by choosing the Bulk Assign button.
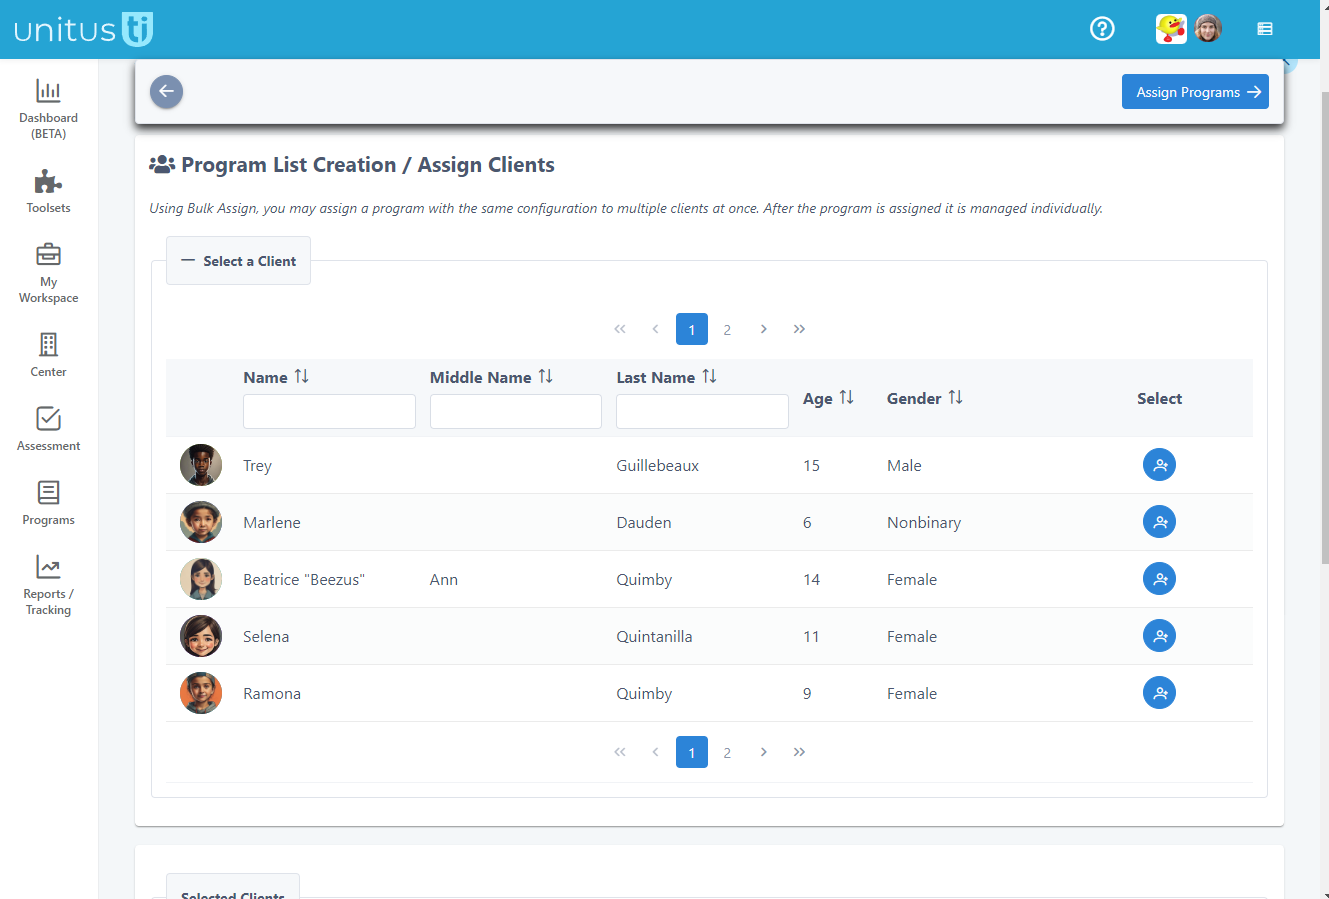
In this process, you'll choose all the clients you wish to assign programs to by clicking the icons in the Select column.
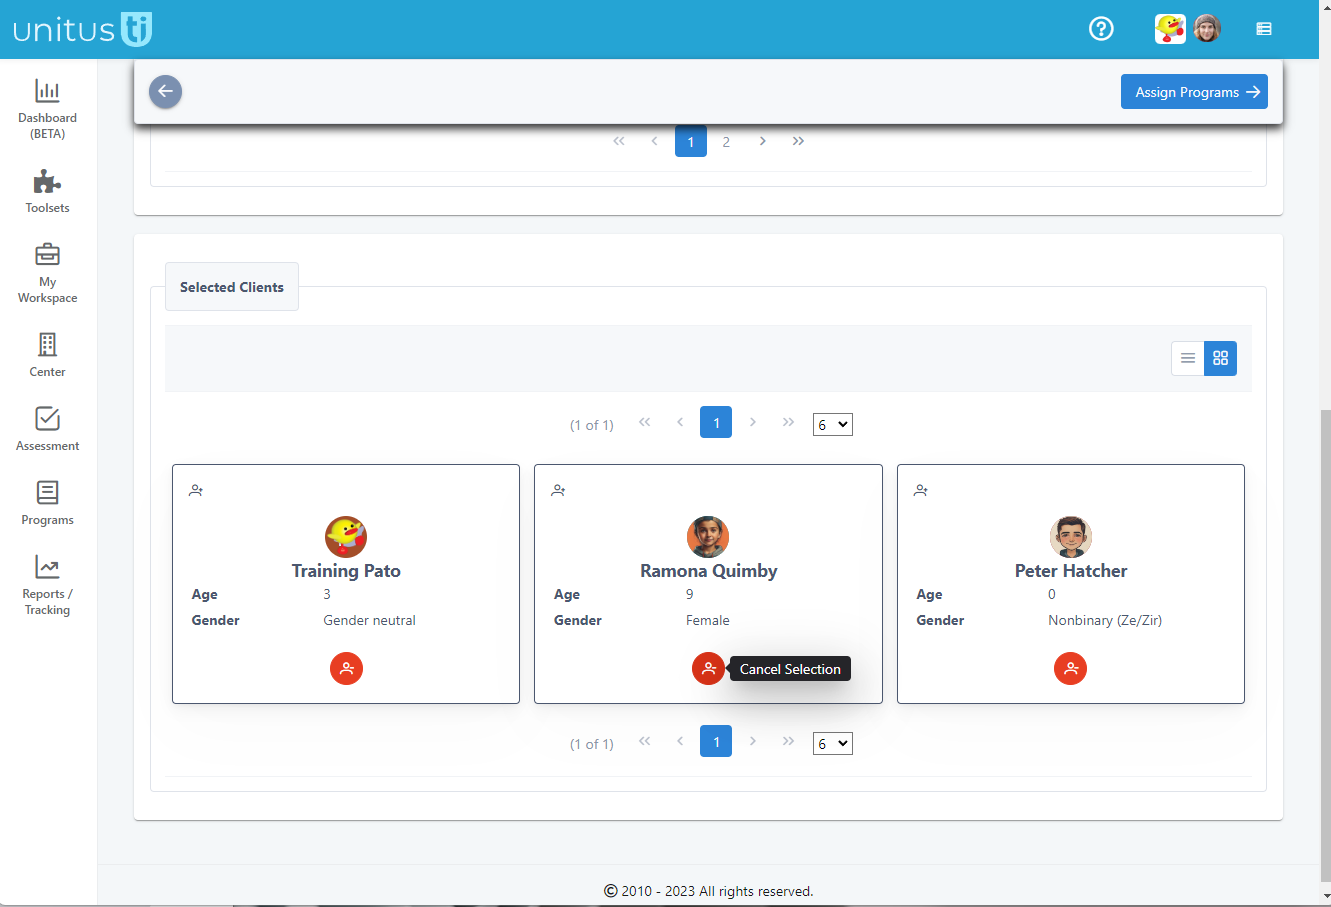
At the bottom of the page, the clients you’ve selected will appear, and can be removed, as needed, using the Cancel Selection button.
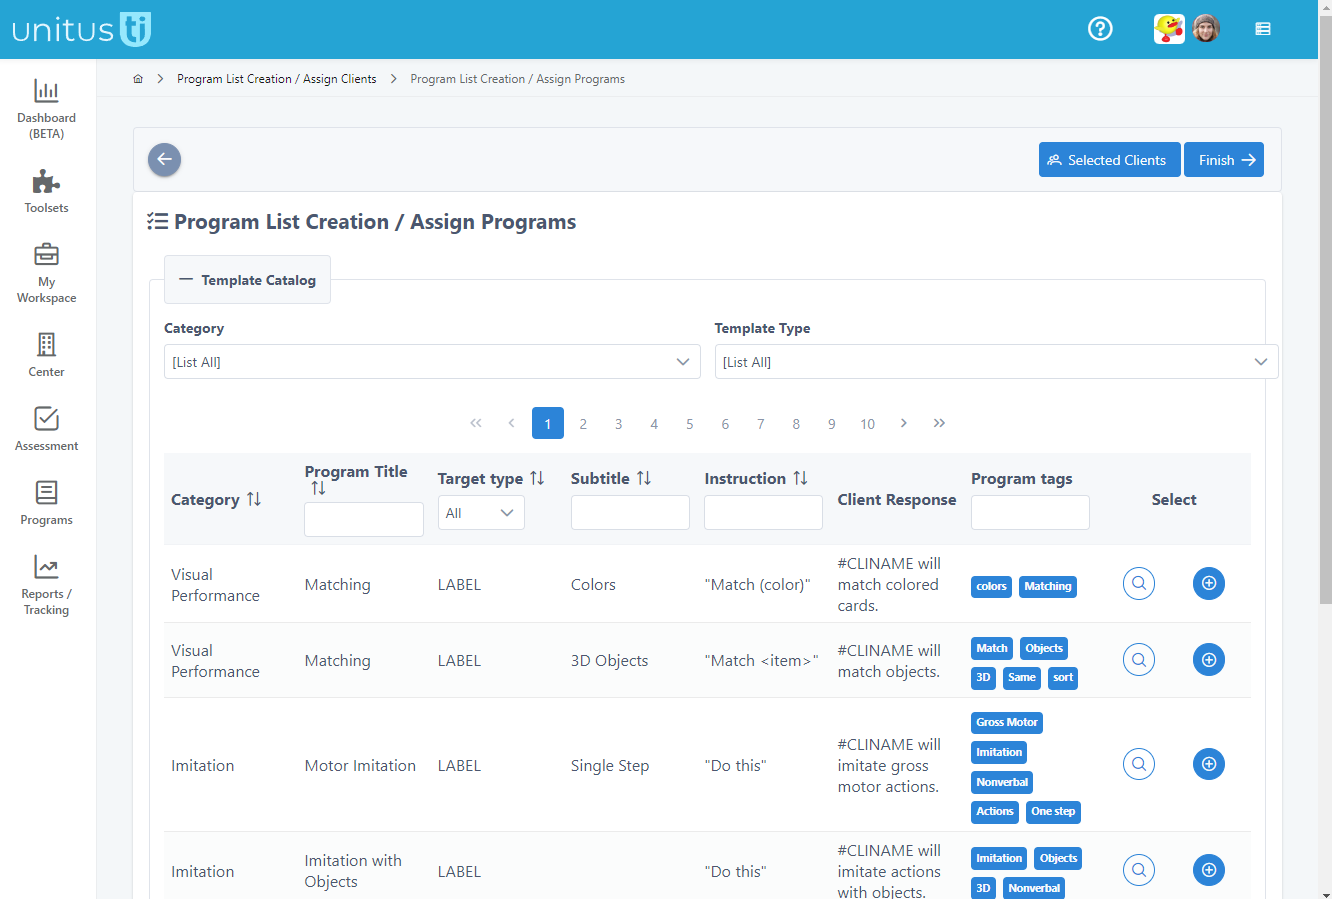
After selecting the clients you wish to assign a program to, choose the Assign Programs button at the top of the page, which will take you to the program template catalog. Using the instructions outlined above for assigning a program to an individual client, you’ll choose programs you wish to add and configure the settings.
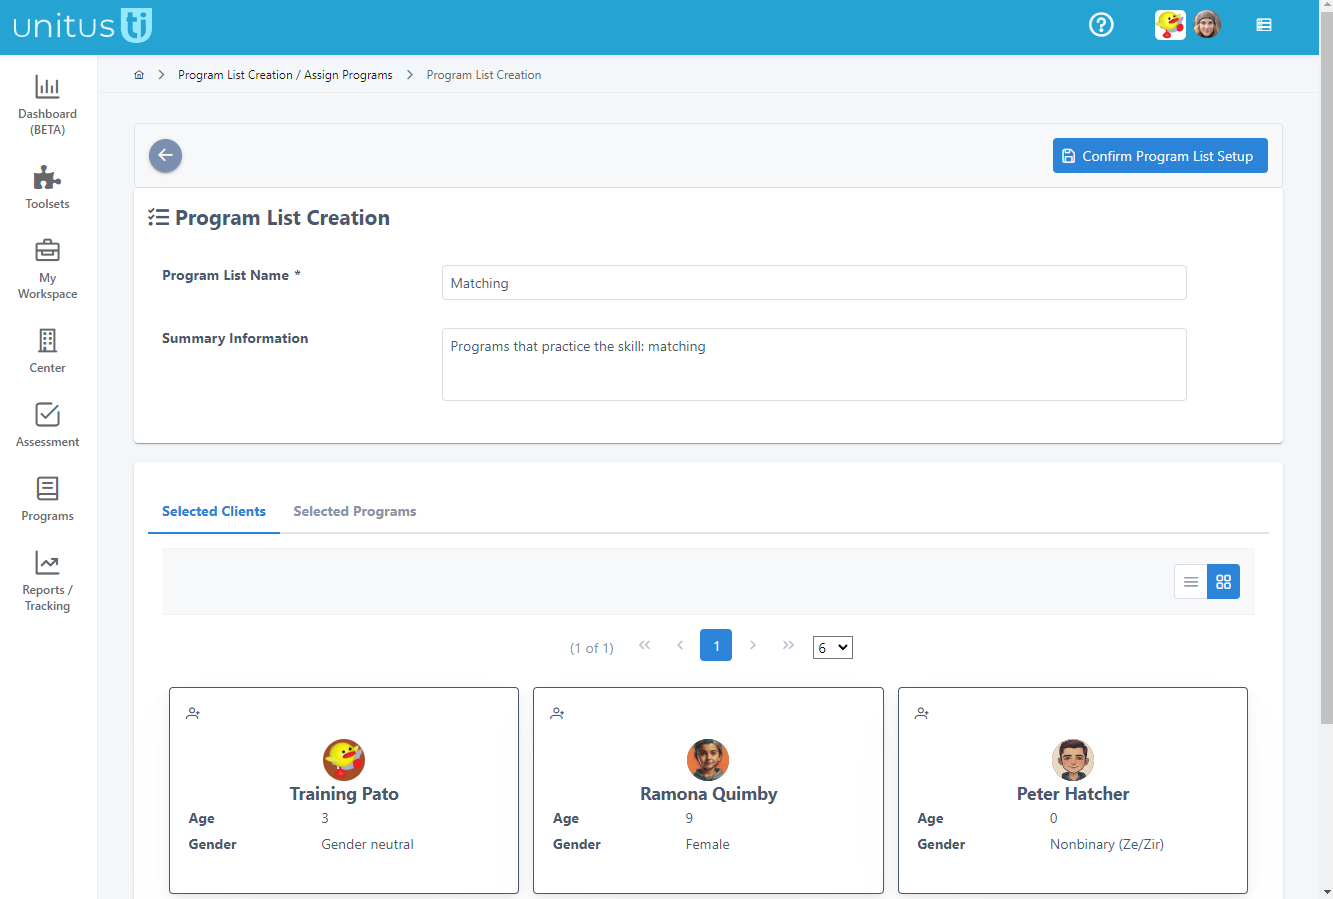
Select the Finish button at the top of the page to go to the list creation screen, where you’ll name the list and add any optional summary information you wish. To save the new list for all the selected clients, click the Confirm Program List Setup button at the top of the screen. You will be redirected to the main Manage Programs screen. Note: once a program or programs are assigned, they are managed individually for each client in their Program List Detail page.
Access to the functions within UnitusTI is determined by the security role or roles given to you by your account administrator. If you’re not able to perform any of the functions outlined here, please contact your administrator to see if your security roles need to be updated, or if they need to perform these actions for you.